Set up your Transparency Center
This guide walks you through configuring and publishing your Transparency Center. By the end, you'll have a branded, consumer-facing privacy portal that your data subjects can access to view policies, manage consent, and submit rights requests.
Prerequisites
Before you begin, ensure you have:
- An active Dxtra workspace with your privacy program generated (complete the onboarding questionnaire first)
- AI-generated documents reviewed and approved in the dashboard (privacy notices, cookie notices, and policies)
- At least one data processor onboarded (Dxtra automatically onboards itself as a processor during setup)
Tip
You don't need to have everything perfect before publishing. The Transparency Center updates automatically as you approve new documents, add processors, and configure consent categories. You can publish now and refine later.
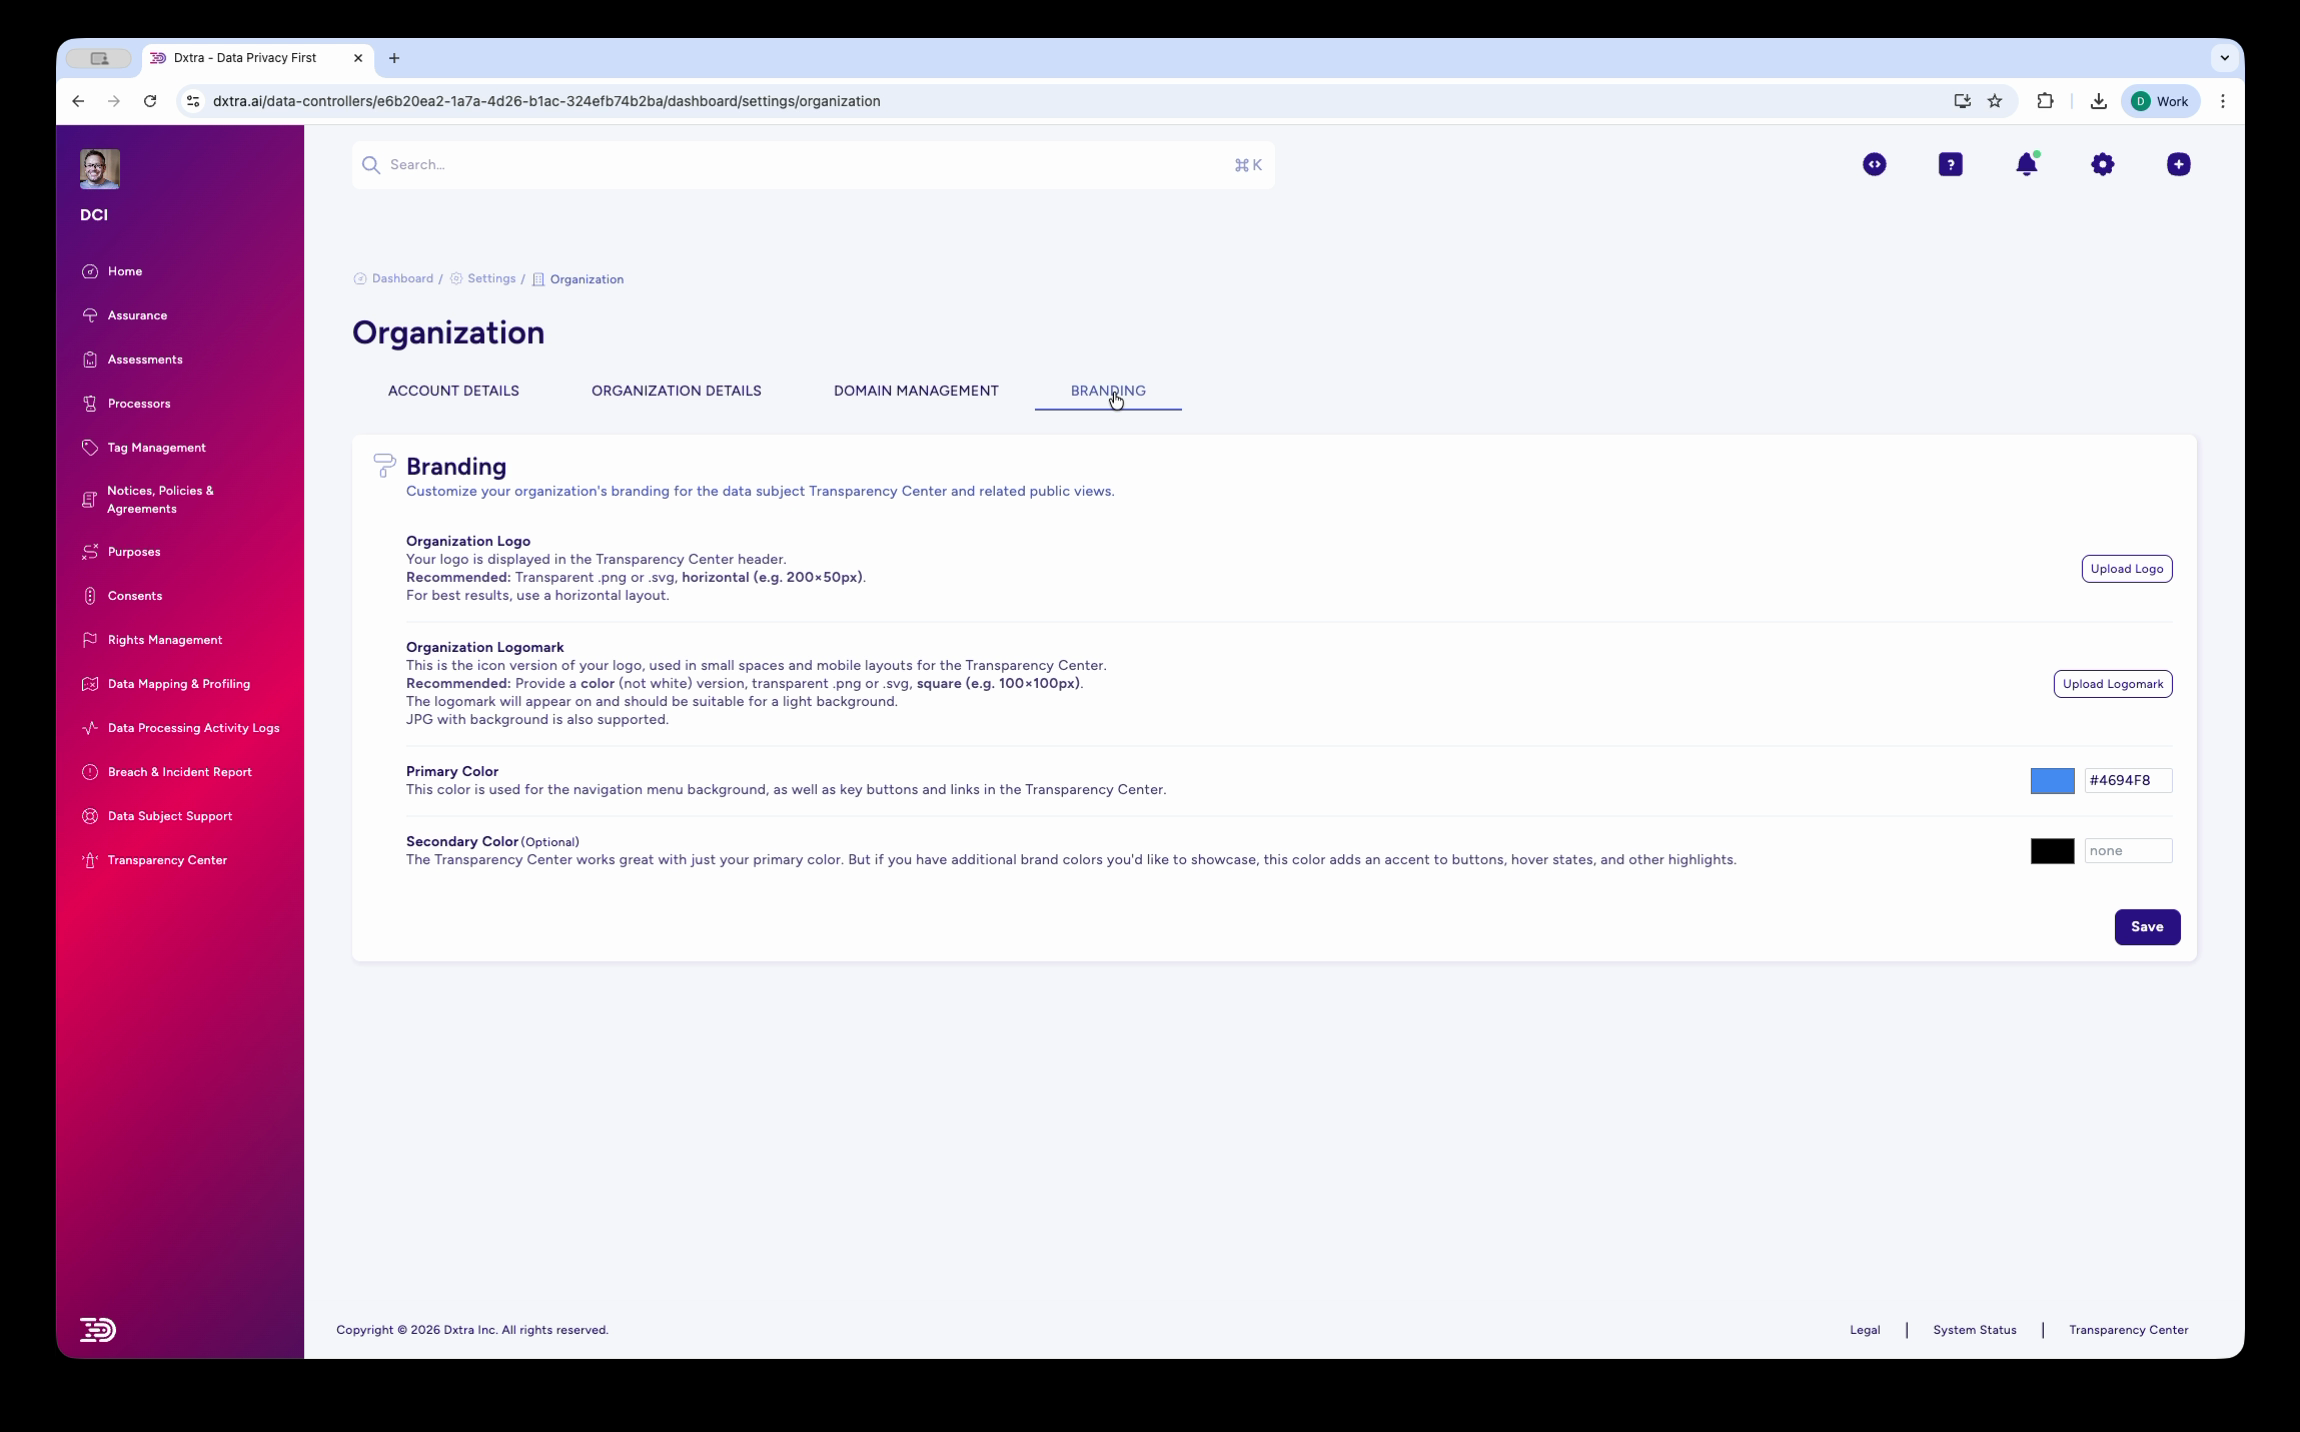
Step 1: Configure organization branding
Go to Organization > Branding in the left sidebar of your Dxtra dashboard. This tab sits alongside Account Details, Organization Details, and Domain Management.
Configure the following:
Organization Logo — Upload your company logo. This appears in the Transparency Center header alongside the "Transparency Center" label. Use a transparent PNG or SVG in horizontal orientation, minimum 300×92px. Click "Replace" to update an existing logo.
Organization Logomark — Upload a smaller square version of your logo (192×192px, transparent PNG or SVG). This is used in email headers (including magic link invitation emails) and mobile layouts.
Primary Color — Set the hex color code for your brand's primary color. This controls the navigation menu background, key buttons, and links throughout the Transparency Center. For example, ACME Inc. uses #7C3AED (purple).
Secondary Color — Set your accent color. This is used for secondary buttons, hover states, and highlights. For example, ACME Inc. uses #1484E8 (blue).
Click Save to apply your branding changes.
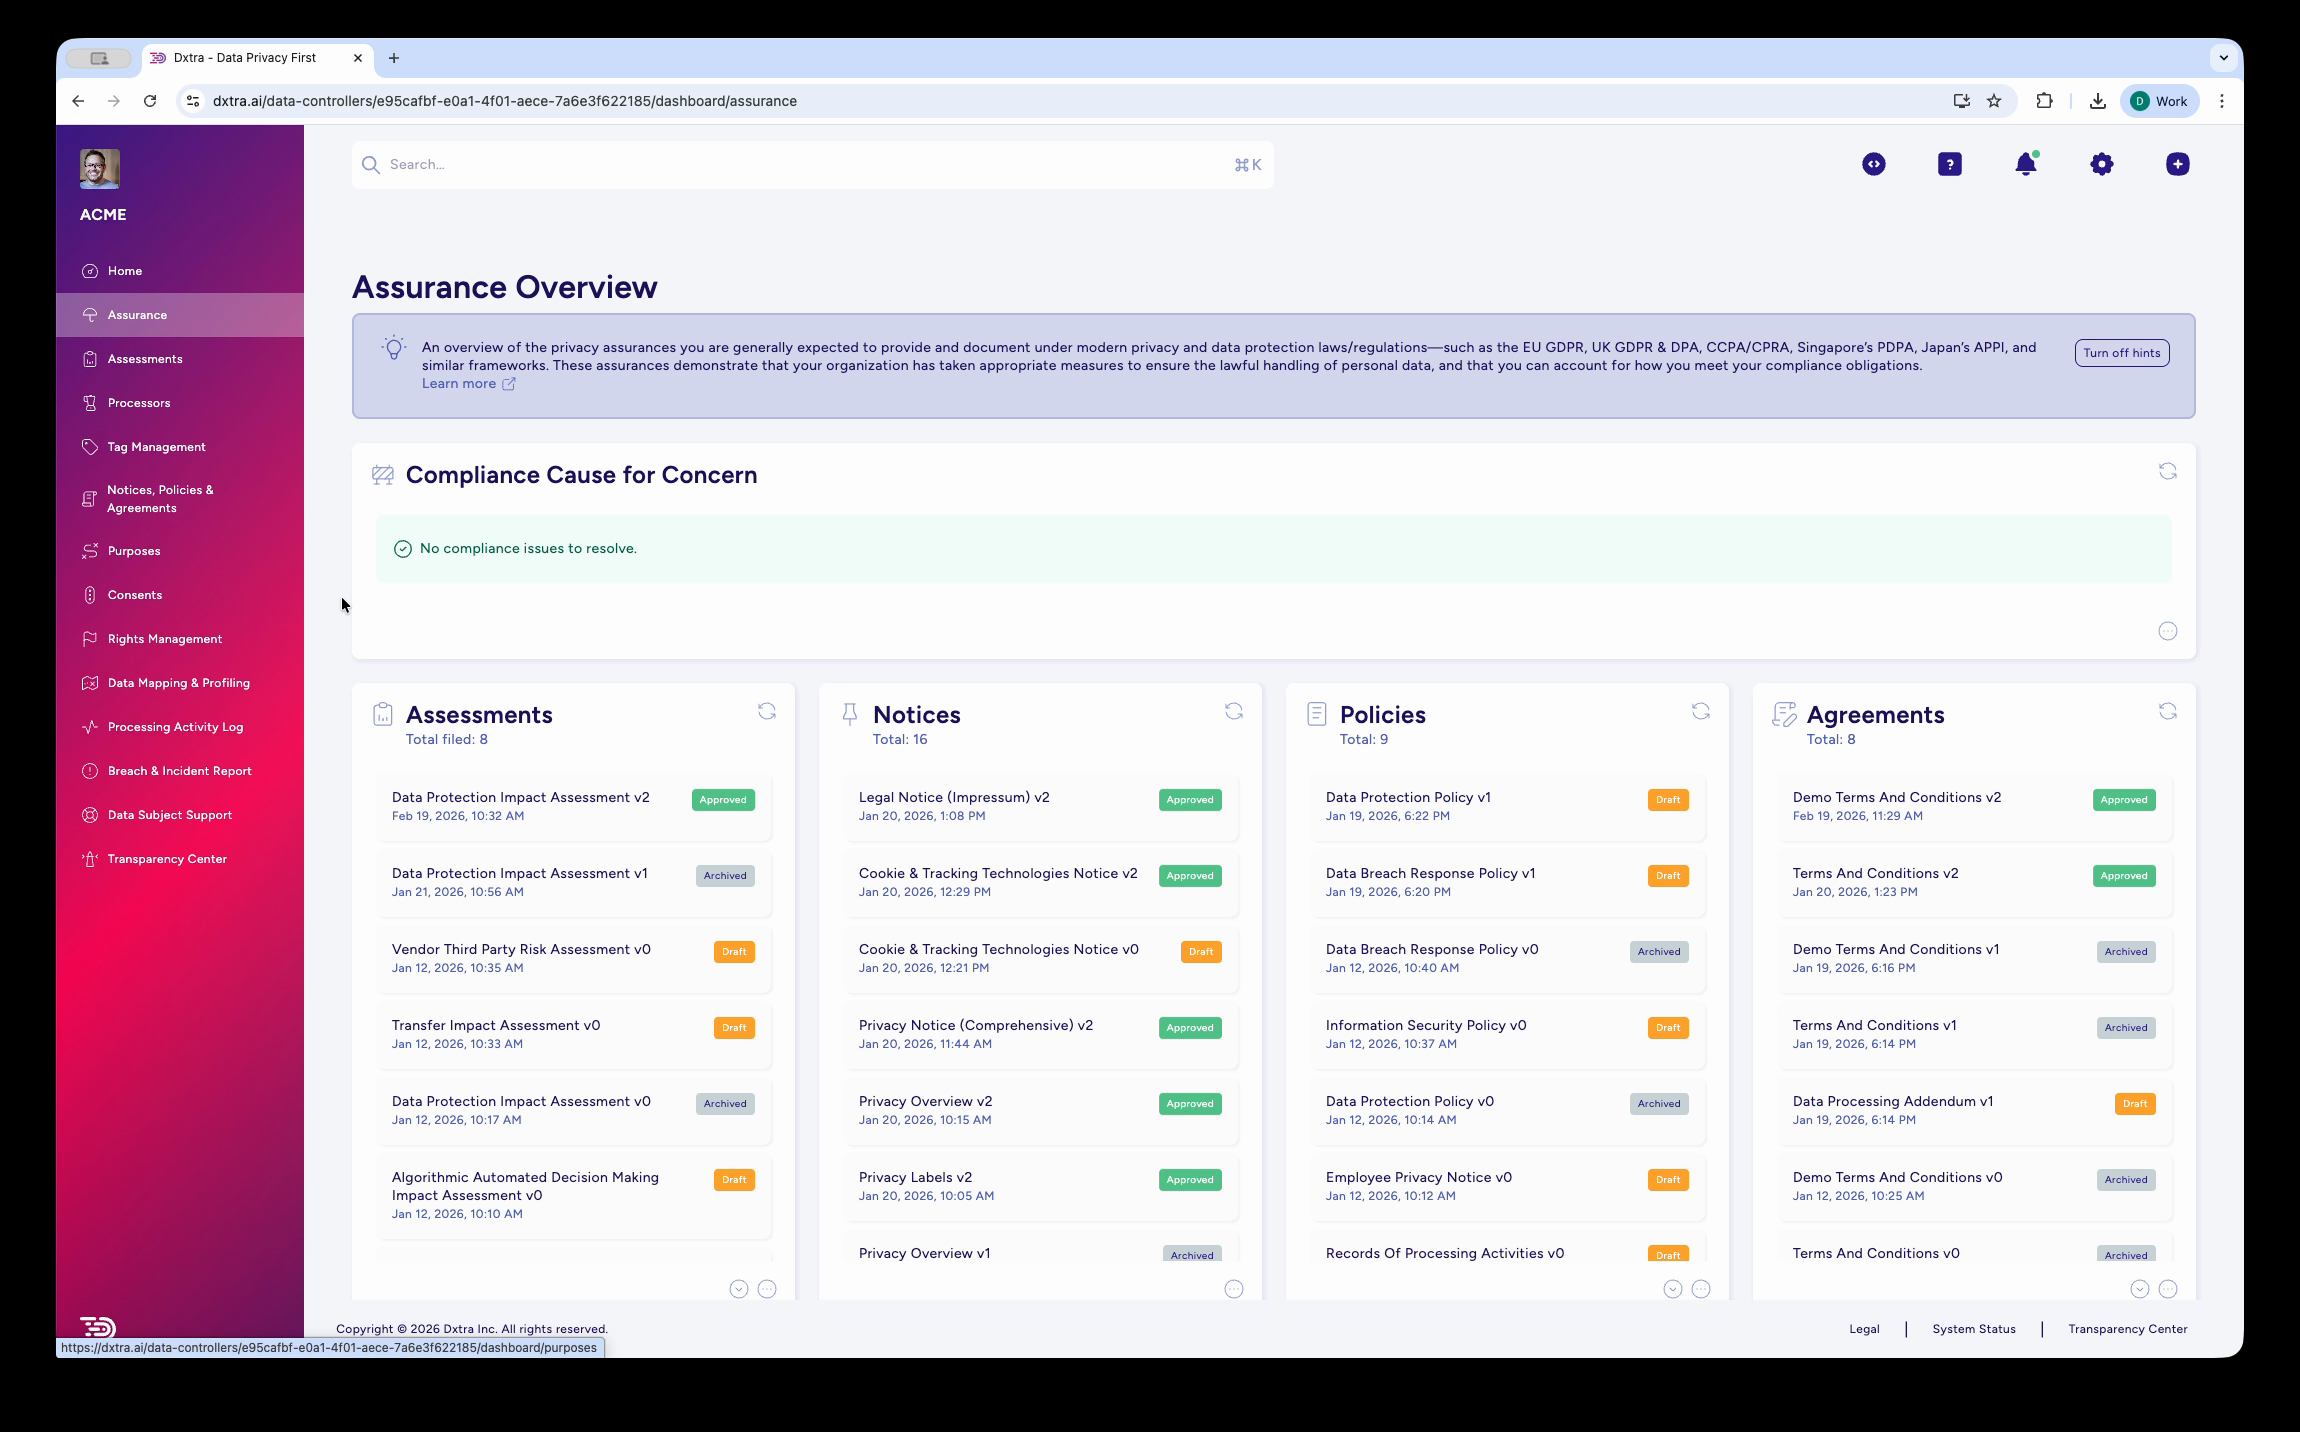
Step 2: Review your privacy documents
The Transparency Center publishes the privacy documents you've approved in Dxtra. Go to the Assurance section in the left sidebar to review what has been generated.
The Assurance Overview displays all AI-generated documents organized in four columns:
- Assessments — Data Protection Impact Assessment, Algorithmic/Automated Decision-Making Impact Assessment, Children's Data Processing Assessment, Legitimate Interests Assessment, Transfer Impact Assessment, Vendor/Third-Party Risk Assessment
- Notices — Privacy Notice, Overview, Privacy Labels, Cookie & Tracking Technologies Notice
- Policies — Data Protection Policy, Employee Privacy Policy, Records of Processing Activities, Data Subject Rights Request Handling Policy, Data Destruction/Retention Policy
- Agreements — Data Processing Addendum, Terms and Conditions
Each document shows its version number, creation date, and timestamp. Review any documents you haven't yet approved — the Transparency Center only publishes approved content.
Human review required
AI-generated content is never published automatically. Every document requires your review and approval before it appears in the Transparency Center. AI-generated content does not constitute legal advice.
Step 3: Verify your processors
Go to Processors in the left sidebar. The Transparency Center shows data subjects which processors handle their data, so verify your processor list is accurate.
Each processor profile includes the legal name, description, data processing agreement URL, supported data subject request types, certifications, categories of personal data processed, processing purposes, legal basis, data security measures, incident response plan, and DPO contact information. Dxtra auto-populates this from its processor intelligence database for pre-built integrations.
If you use custom processors, onboard them via the Onboard a Custom Data Processor page (a four-step wizard: Processor Info, Event Config, Review, and Webhook Info).
Step 4: Configure consent categories
Go to Consents in the left sidebar. The Transparency Center displays your consent categories to data subjects and lets them toggle preferences on or off.
Verify that your consent categories are configured. Dxtra uses the standard categories: Strictly Necessary (always on), Performance/Analytics, Functional, and Targeting/Marketing, plus any custom categories you've defined. Each category can have individual consent items (e.g. Advertising Personalisation, Data Sharing with Third Parties, User Profiling) that data subjects can control independently.
Step 5: Configure rights management
Go to Rights Management in the left sidebar. The admin configuration page lets you toggle which rights services are available to data subjects.
Data Subject Rights (7 toggles) — Toggle on/off: 1. Right to Access 2. Right to Rectification 3. Right to Erasure 4. Right to Restriction 5. Right to Portability 6. Right to Object 7. Right to Not Be Subject to Automated Decision-Making
Privacy Controls — Toggle on/off: Detect Global Privacy Control (GPC) (separate from the 7 rights).
Below the toggles, the Data Subject Rights Request Template controls which request types appear in the Transparency Center's self-service form. Available types include Access, Rectification, Erasure, Restriction, Portability, Objection, and General Requests (free-text).
An embeddable code panel on the right displays HTML/JavaScript snippets you can copy into your website to enable self-service rights requests outside the Transparency Center.
Step 6: Configure your domain
Go to Organization > Domain Management. You have two options:
Use the default Dxtra URL — Your Transparency Center is accessible at transparencycenter.dxtra.ai with your Data Controller ID. No DNS configuration required.
Use a custom subdomain — Point a subdomain like privacy.yourbusiness.com to the Dxtra Transparency Center. This requires adding a CNAME record in your DNS provider.
Note
Custom domain configuration details will be finalized as Dxtra moves from Beta to general availability. Contact support@dxtra.ai for assistance with custom domain setup.
Step 7: Publish
Once branding, documents, processors, consent categories, and rights services are configured, your Transparency Center is ready. The Dxtra home dashboard includes a guided checklist with a "Personalize & publish Transparency Center" step — completing this makes your Transparency Center live.
After publishing
Link from your website
Add a Transparency Center link to your website's footer alongside your other privacy links. The standard Dxtra footer pattern includes: Legal Notice (Impressum), Terms & Conditions, Privacy Notice, Cookie Notice, Do Not Sell Or Share My Personal Information, and Transparency Center.
Monitor engagement
The Dxtra home dashboard provides Transparency Center analytics showing visitor traffic by section (Overview, Privacy Notice, Consents, Rights Management, Processing Activity Log, Help) with daily, weekly, monthly, and yearly views.
The Data Subject Support panel shows total visits, top FAQs, and engagement breakdown. Use these metrics to understand which privacy information your data subjects care about most.
Keep content current
When regulations change or your business context evolves, use an AI Regeneration to update your compliance documents. Regenerated and approved documents are automatically published to the Transparency Center — no manual updates required. AI Regeneration quotas vary by plan (Start: 1/month, Growth: 2/month, Scale: 3/month, Enterprise: 10/month).
Respond to rights requests
When a data subject submits a rights request through the Transparency Center, it appears in your admin Rights Management dashboard with a Pending status. Review, verify, and action the request within the regulatory deadline (GDPR: one month, CCPA: 45 days). Dxtra tracks deadlines automatically.
Next steps
- Embed the Transparency Center as a web component in your application
- Customize the appearance with colors, typography, and layout
- Handle data subject requests that come through the Transparency Center
Troubleshooting: See FAQs for common setup issues, or email support@dxtra.ai.