Add a data processor
This guide walks you through onboarding a new data processor in Dxtra. The onboarding wizard connects the processor to your account, pre-populates its compliance profile, and activates data synchronization.
Prerequisites
- A Dxtra account with admin access
- For pre-built integrations: an API key or credentials from the processor (e.g. a Stripe Restricted Key)
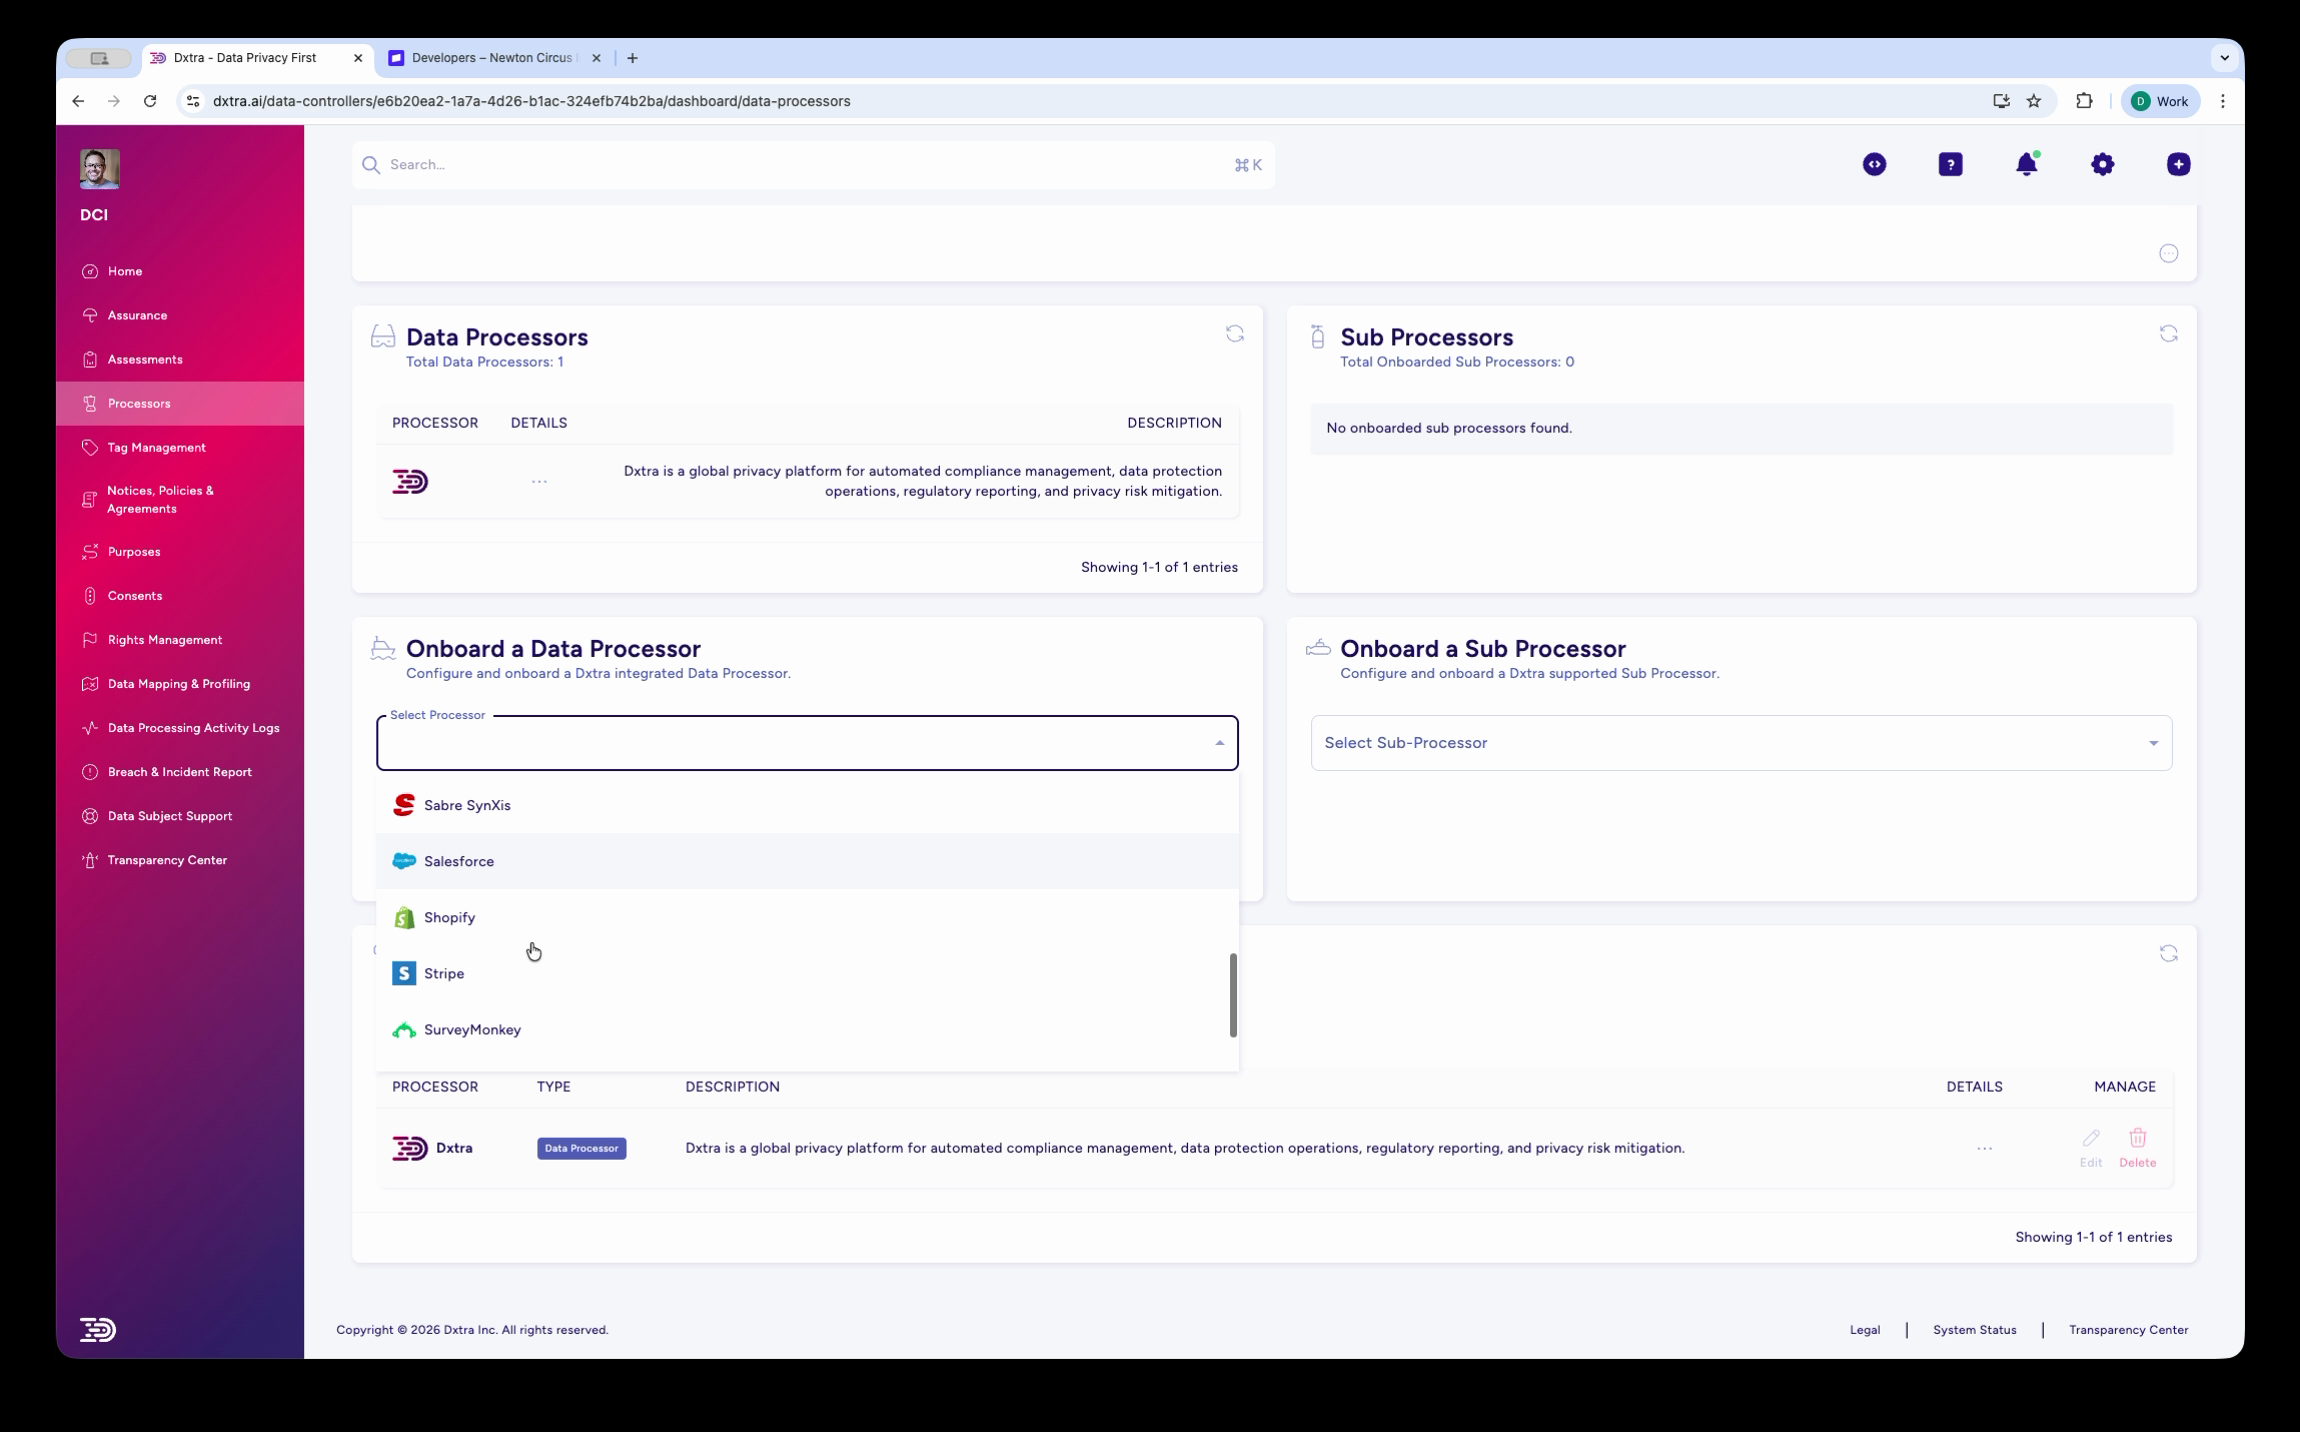
Step 1: Select a processor
Go to Processors in the left sidebar. In the Onboard a Data Processor section, open the Select Processor dropdown.
The dropdown shows pre-built integrations with their logos: Salesforce, Shopify, Stripe, SurveyMonkey, and others. Select the processor you want to onboard.
Tip
If the processor you need is not in the dropdown, click Refer Processor below the form to request it. You can also onboard custom processors — see custom integrations for webhook-based alternatives.
Step 2: Review processor details
After selecting a processor, the onboarding wizard opens. The number of steps varies by integration — some processors (like Stripe) have a single-step setup, while others (like NetSuite) include additional configuration for integration type and webhook setup. The first step shows the processor's pre-populated details:
- The processor's logo and name
- A description of what the processor does and what services it provides
- An API key field specific to the processor (e.g. "Stripe Restricted Key" for Stripe)
- Your Data Controller DID — pre-populated with your organization's Decentralized Identifier
- For processors with multiple integration modes (e.g. NetSuite): an Integration Type selector (Webhook Mode or Polling Mode/OAuth)
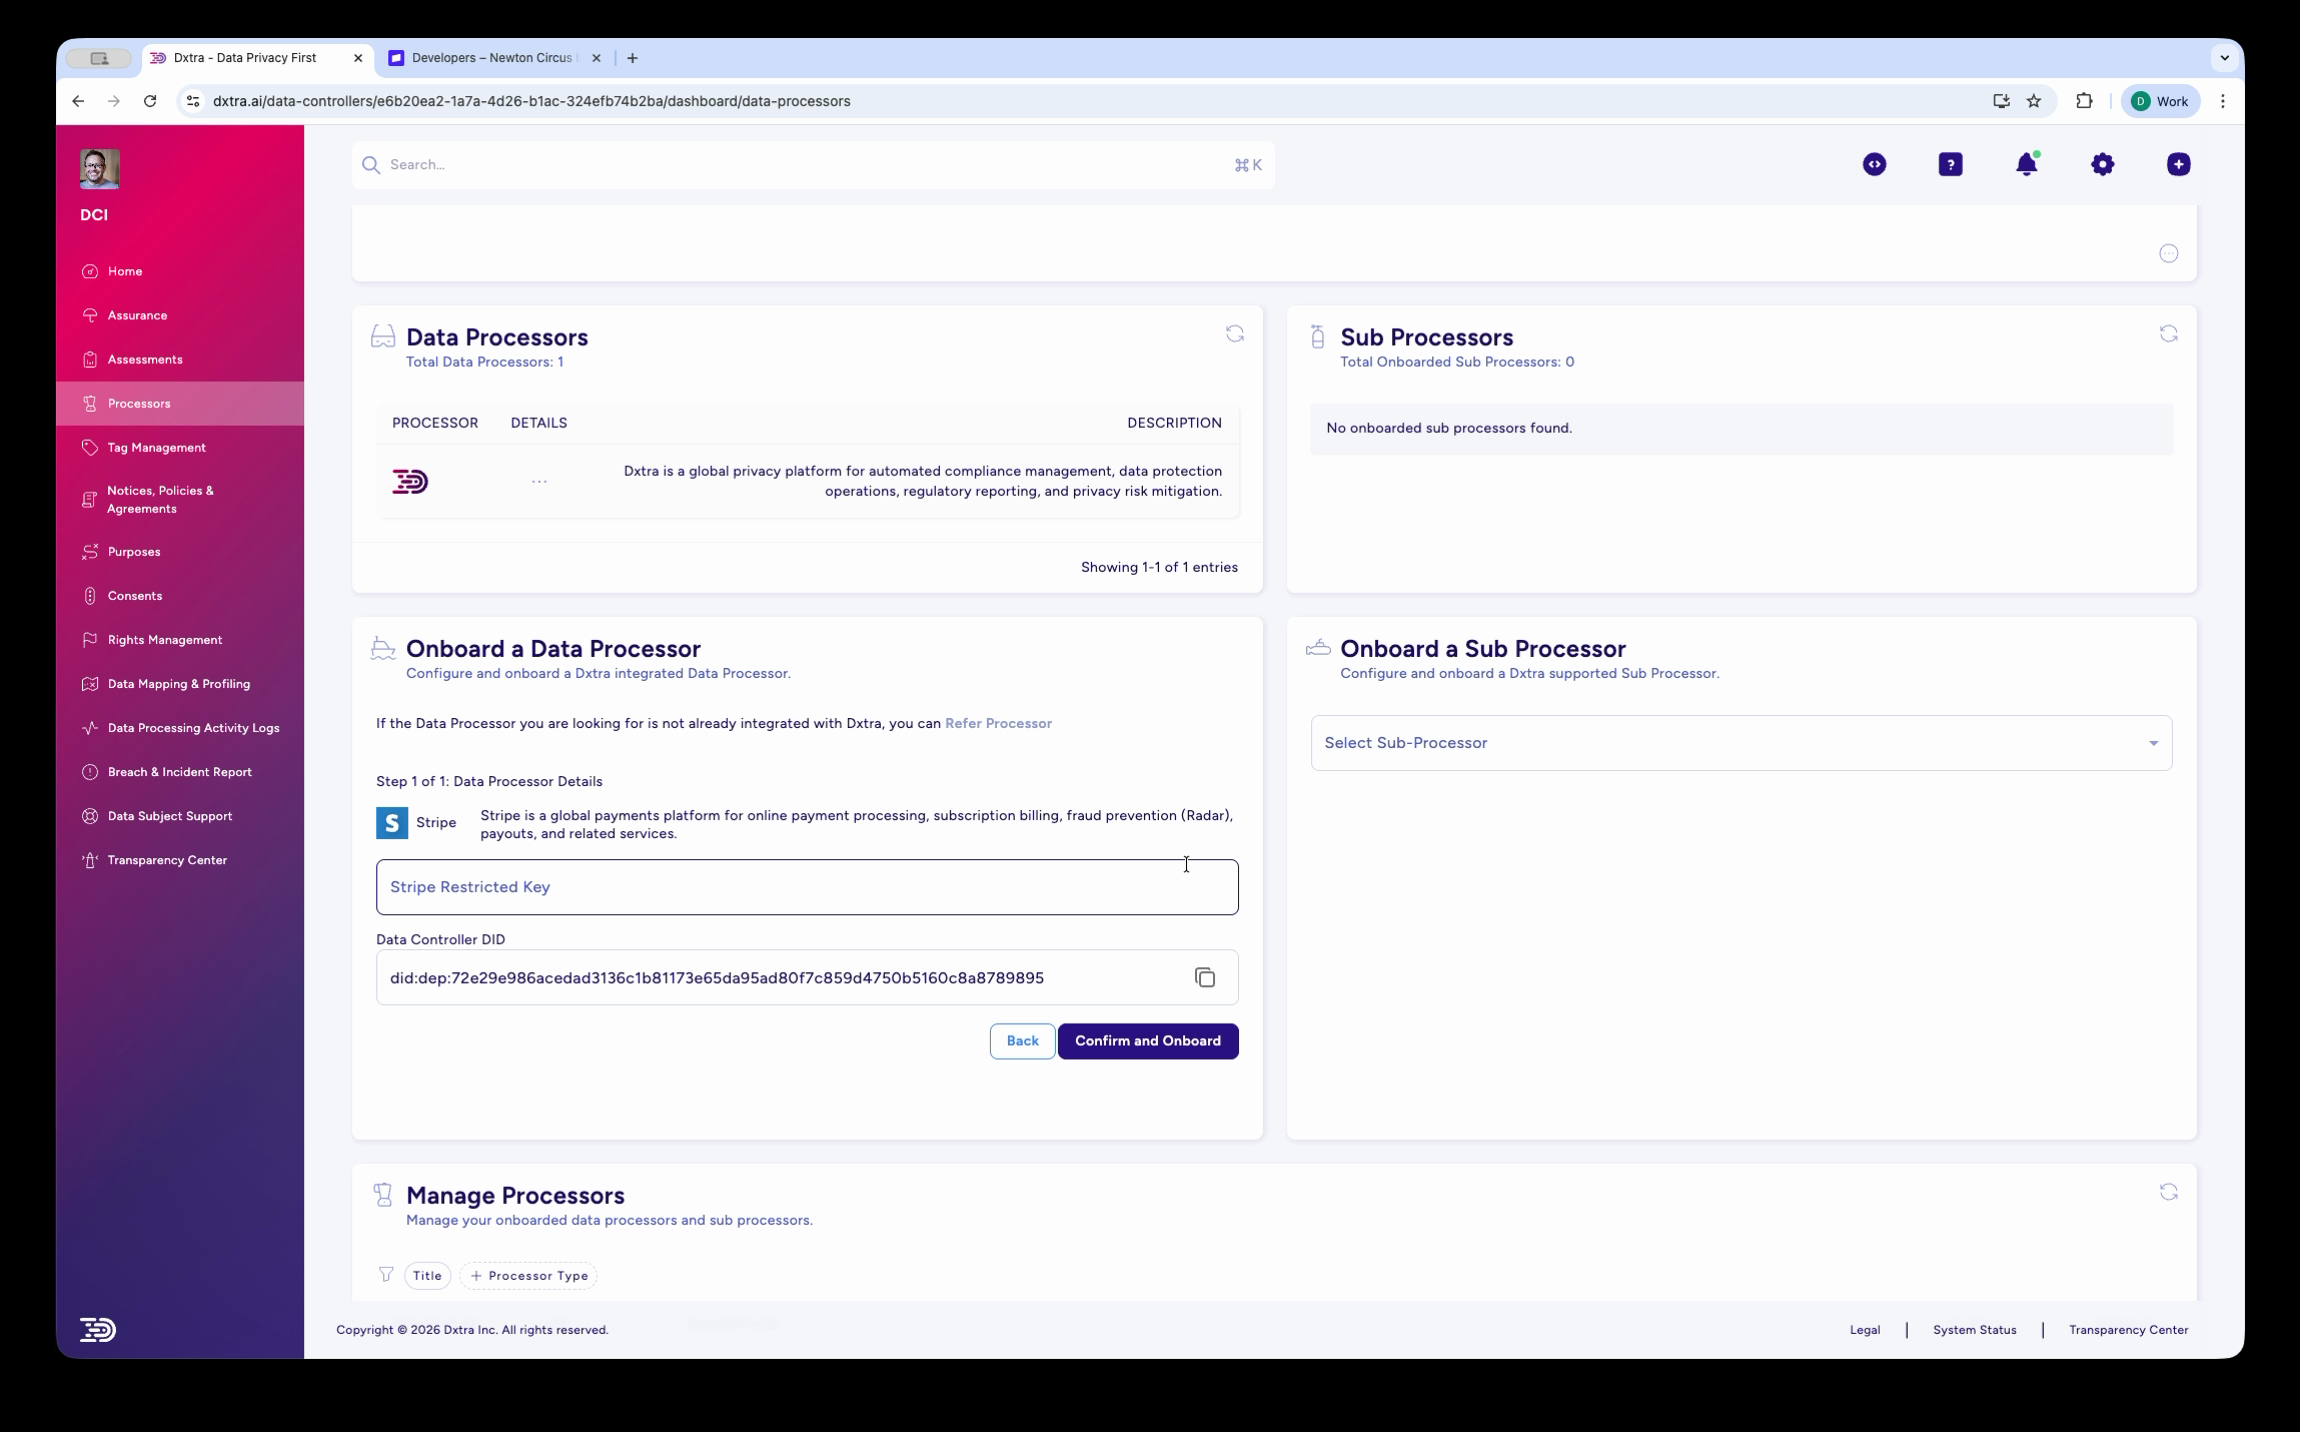
Step 3: Enter your API key
Enter the API key or credentials for the processor. Each processor requires different credentials:
Stripe — A Restricted Key from your Stripe Dashboard. Go to Stripe → Developers → API Keys → Create restricted key. The key needs read access to the data you want Dxtra to monitor (customers, payment intents, etc.).
Salesforce — OAuth credentials from your Connected App. See Salesforce integration for setup details.
Shopify — A Custom App API access token. See Shopify integration for the required API scopes.
Warning
Keep your API keys secure. Dxtra encrypts credentials at rest using AES-256 encryption. Never share API keys in screenshots, emails, or public channels.
Step 4: Confirm and onboard
Click Confirm and Onboard to complete the connection. Dxtra:
- Validates the API key against the processor's API
- Pre-populates the processor profile (DPA link, certifications, data categories, processing locations)
- Activates data synchronization between the processor and your Dxtra account
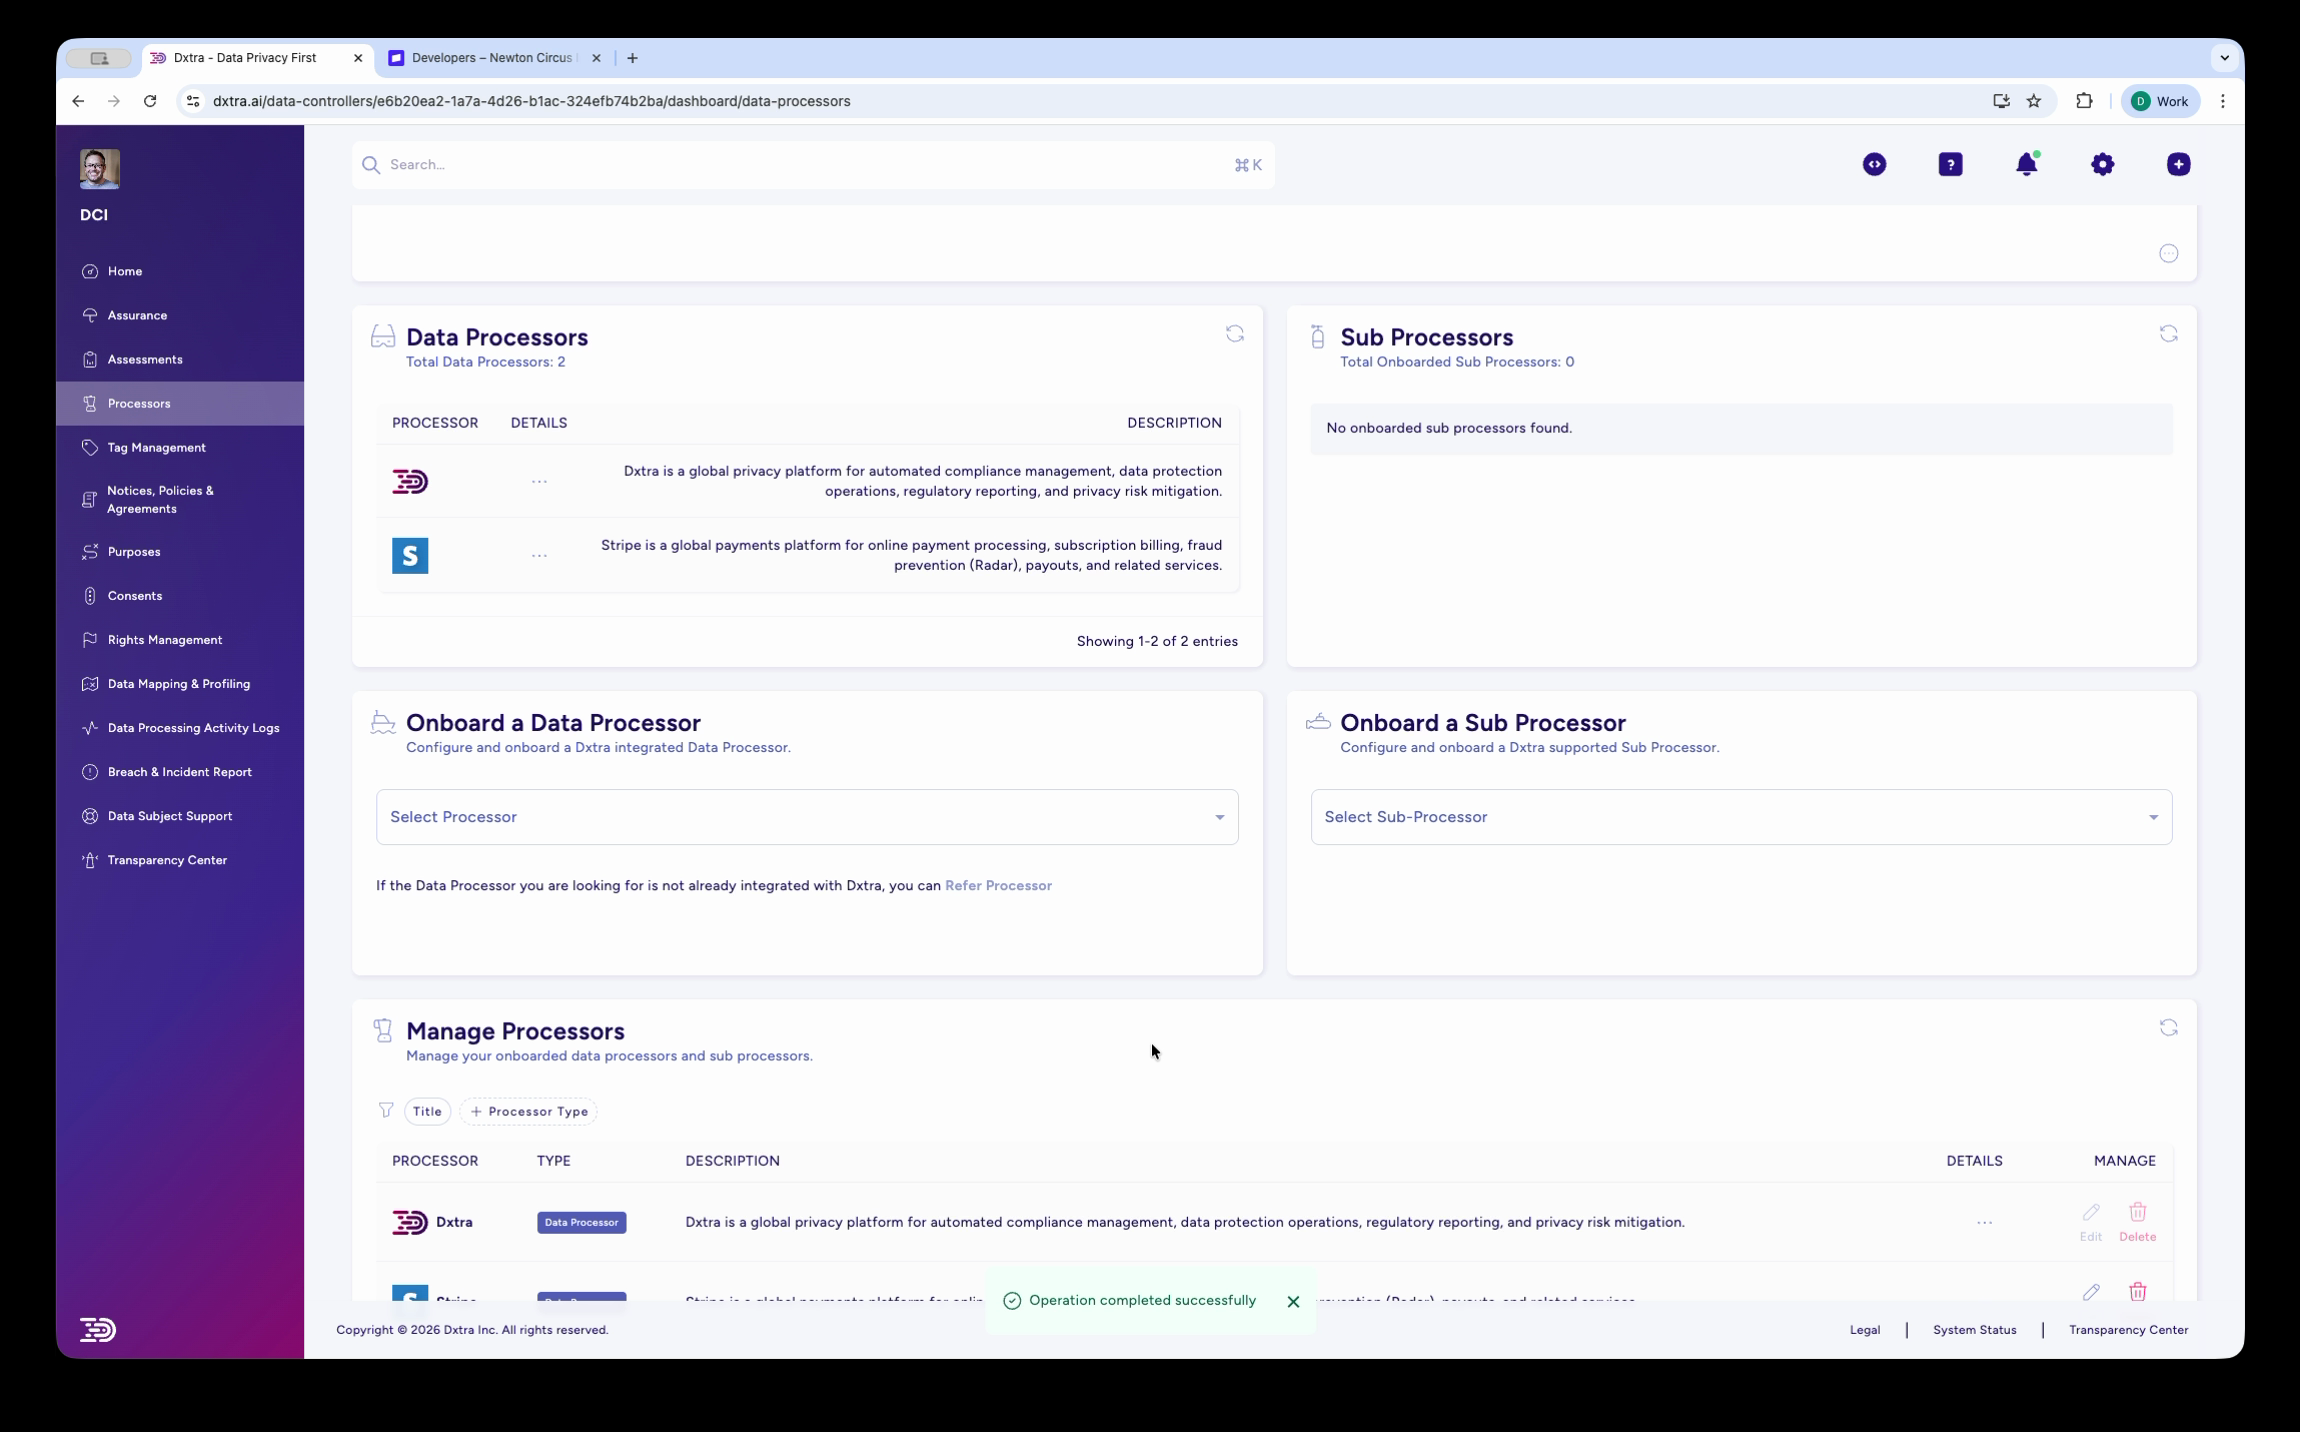
- Adds the processor to the Data Processors list and the Manage Processors table
A success toast confirms "Operation completed successfully." The new processor appears in the Manage Processors table with an Interconnected status badge.
Step 5: Review the processor profile
After onboarding, click Details on the new processor in the Manage Processors table. The processor details panel shows the complete profile that Dxtra pre-populated:
- Data Processing Agreement — Link to the processor's DPA
- Certifications — Security certifications (ISO 27001, SOC 2, PCI DSS, etc.)
- Processing Purposes — Which purposes the processor fulfils
- Data Processing Locations — Where data is processed
- Incident Response Plan — The processor's breach response procedures
- Deletion Policy and Retention Policy — Data lifecycle practices
Review these details to verify they are accurate. You can update any field that needs correction.
Adding a sub processor
To add a sub processor (a third party that your processor uses), use the Onboard a Sub Processor section on the same page. Open the Select Sub Processor dropdown, choose the sub processor, and follow the same wizard flow.
Sub processors appear in the Sub Processors table at the top-right of the Processors page.
What happens after onboarding
Once a processor is onboarded and Interconnected:
- Processing activity logs record data exchanges between your organization and the processor. See processing activity logs.
- PII scanning can detect personal data in files from connected file storage processors. See PII scanning.
- Data subject requests can be routed to the processor for fulfillment. See DSR management.
- Vendor risk assessments can reference the processor's compliance profile. See vendor risk assessments.
Troubleshooting
API key rejected — Verify the key is correct and has the required permissions. For Stripe, ensure the key is a Restricted Key with the necessary read scopes. For Salesforce, confirm the Connected App is authorized.
Processor not in dropdown — The processor may not have a pre-built integration yet. Click Refer Processor to request one, or set up a custom integration using webhooks or Custom Functions.
Status not showing Interconnected — Check that the API key is still valid and has not been revoked. Go to the processor's dashboard and verify the key status. If the key was rotated, update it in Dxtra by editing the processor in the Manage table.
Related
- Processor management overview — The Processors page and what each section does
- Monitor processors — Review processor details and track compliance
- Vendor risk assessments — Assess processor security posture
- Integrations — Full list of supported integrations
Not legal advice
AI-generated content does not constitute legal advice. Consult a qualified legal professional for advice specific to your jurisdiction and business context.