Install Tag Manager
This guide walks you through activating Tag Manager for your domain and installing the tracking script on your website. By the end, your site will be sending page view and event data to Tag Manager's server-side processing pipeline.
Prerequisites
- A Dxtra account with at least one verified domain
- Access to your website's HTML (specifically the
<head>section) - Tag Management enabled in the Dxtra dashboard
Step 1: Activate your domain
Go to Tag Management in the left sidebar of the Dxtra dashboard.
In the Domains card, select your verified domain from the dropdown. If your domain does not appear, you need to verify it first — go to Settings > Domains and complete the domain verification process.
Click Set as Primary to associate the domain with Tag Manager. A success notification confirms the domain has been activated.
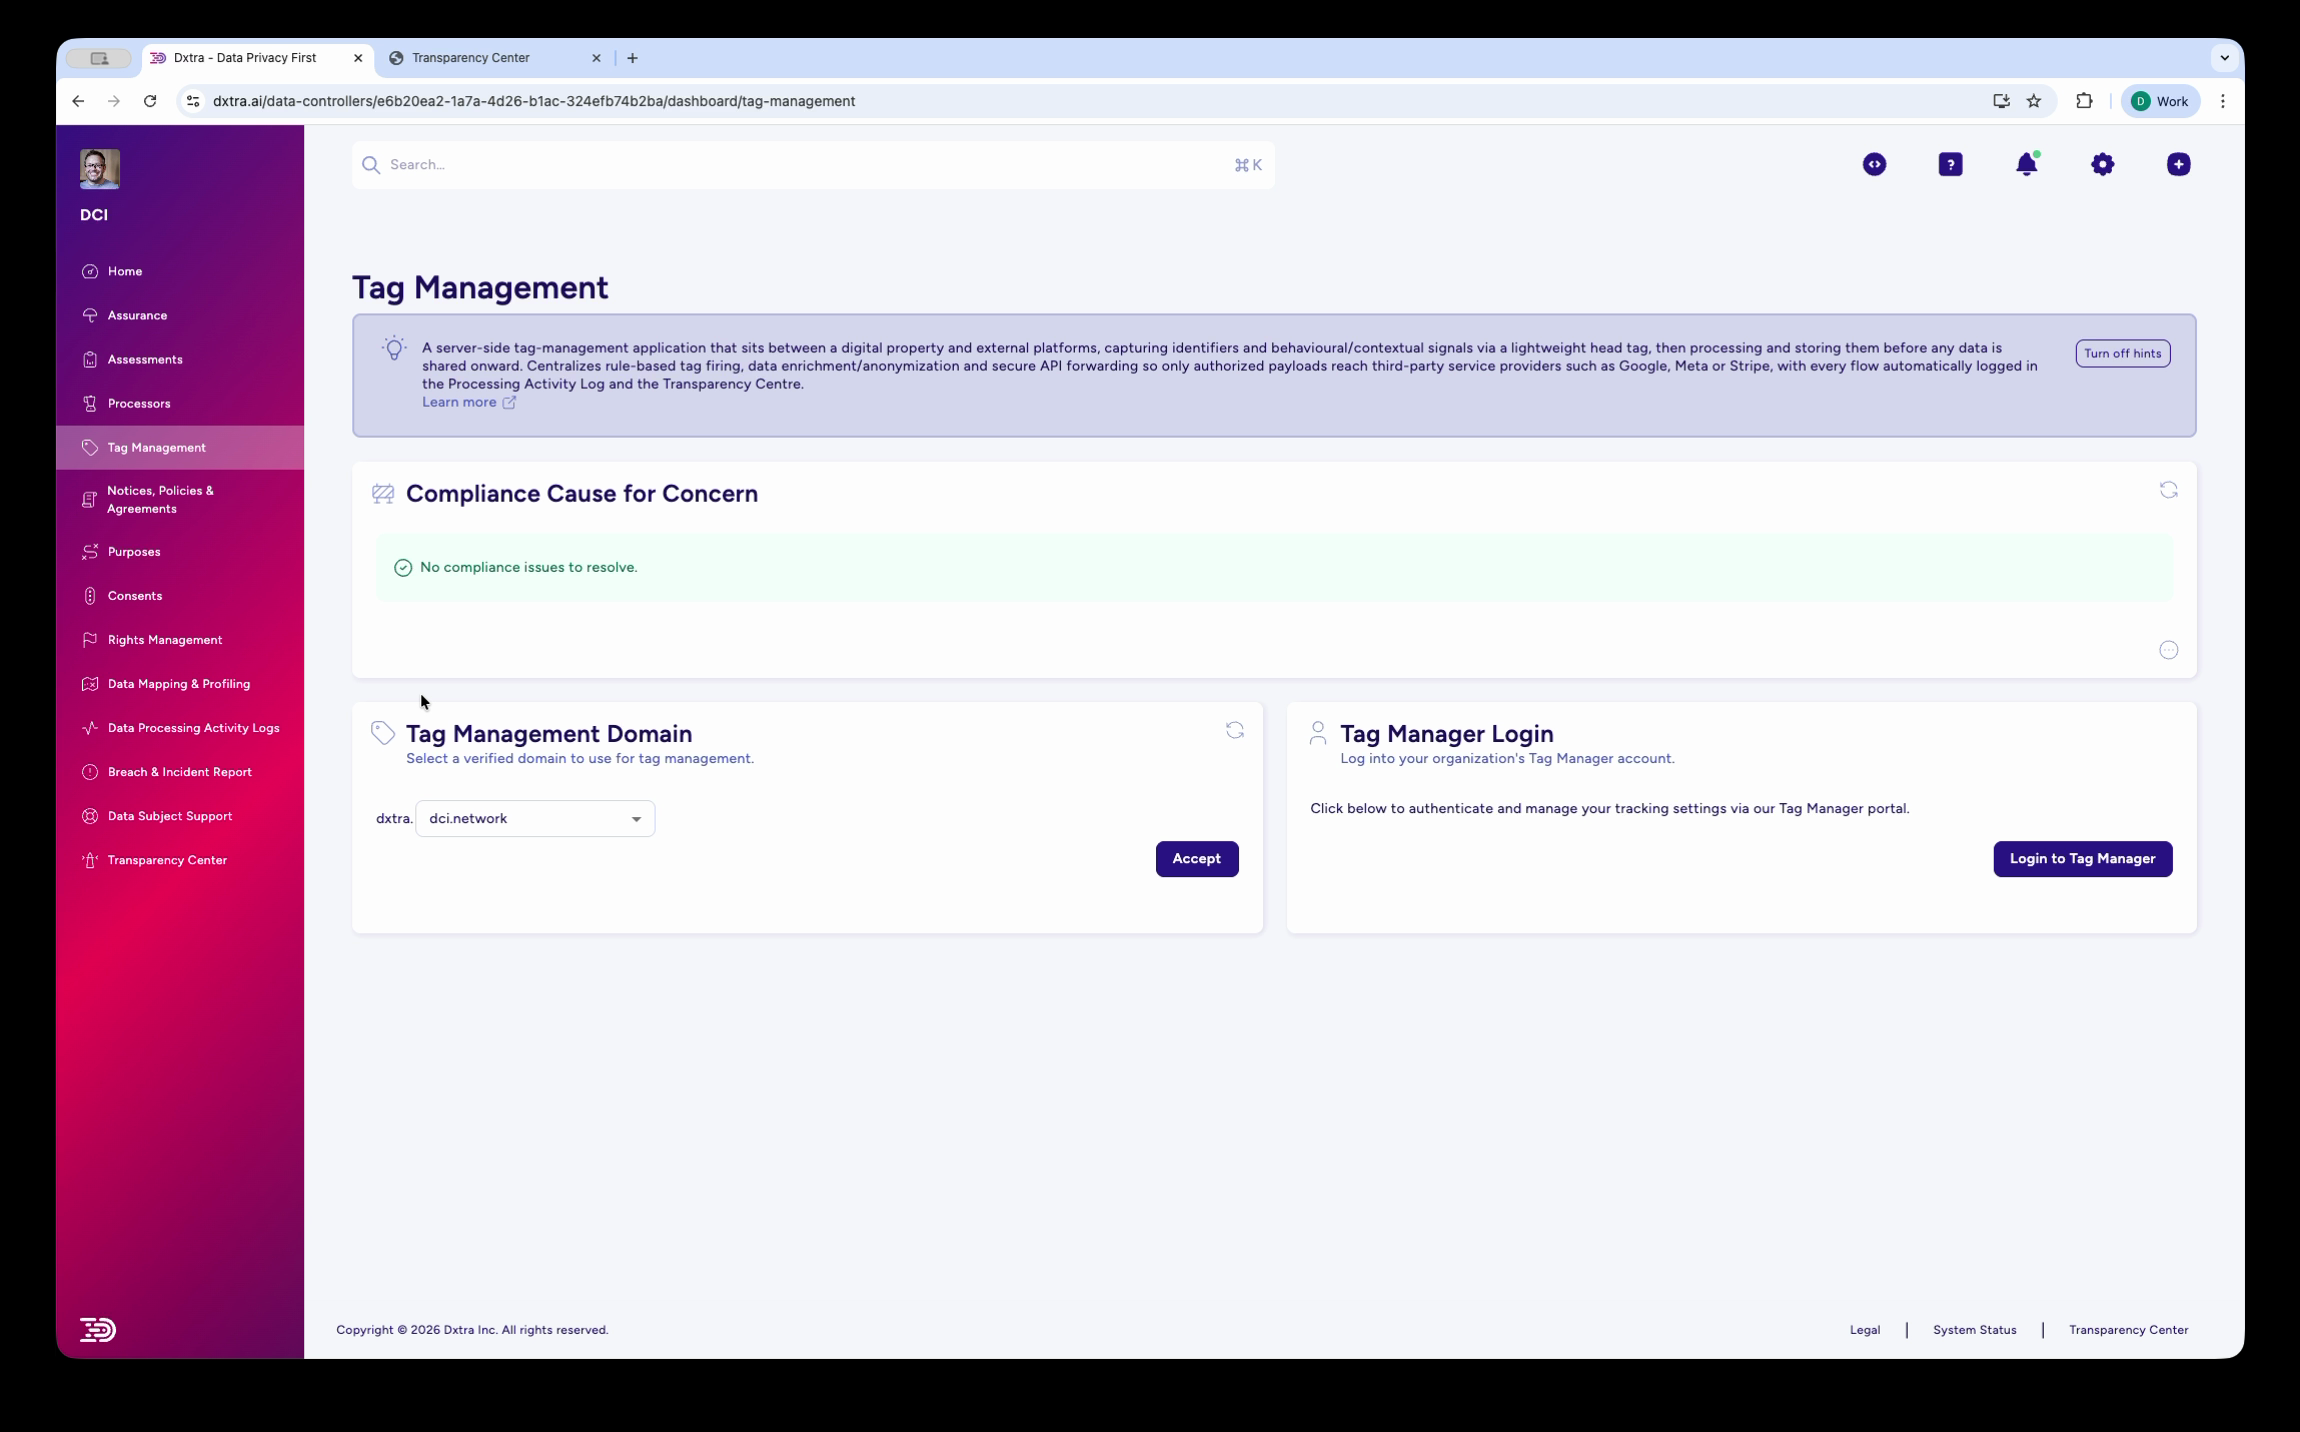
Domains per plan
The number of domains you can activate depends on your plan: Start includes 1 domain, Growth 2, Scale 3, and Enterprise 10. Each domain runs as its own Tag Manager application with its own script. To activate more domains, upgrade your plan.
Step 2: Log in to Tag Manager
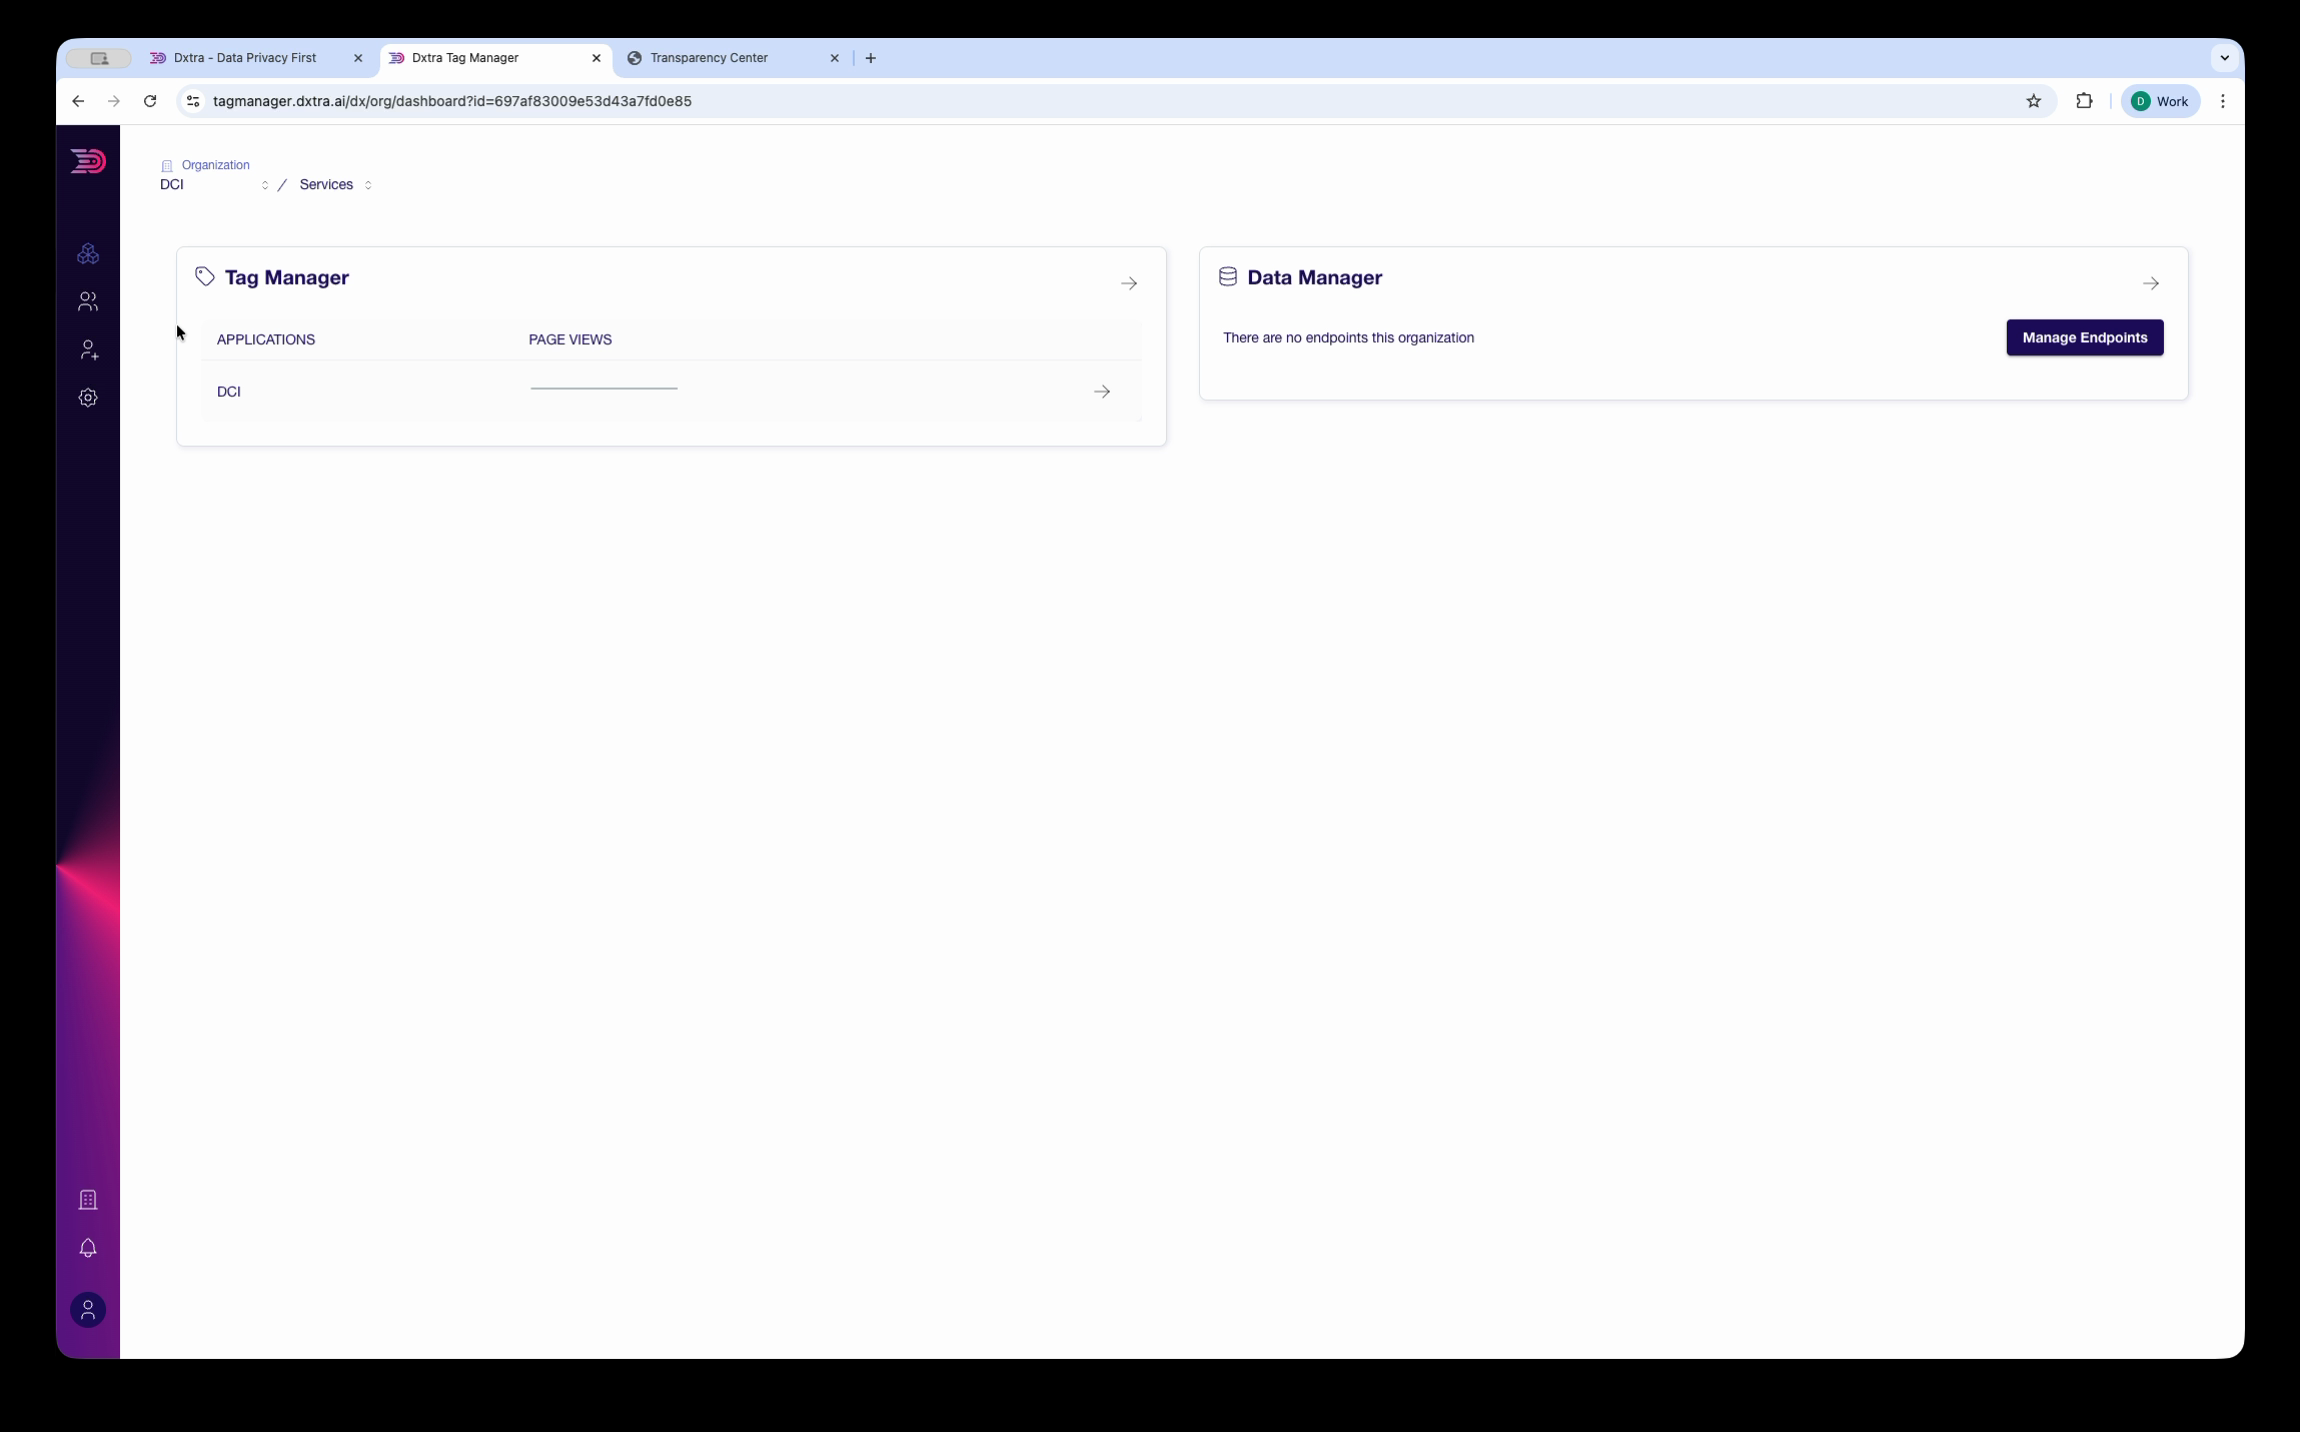
In the Tag Manager Console card on the same page, click Open Tag Manager Console. This opens the Tag Manager application at tagmanager.dxtra.ai and authenticates you automatically.
You land on the Organizations page, which lists all organizations associated with your Dxtra account. Select the organization that corresponds to your Data Controller.
Step 3: Select your application
From the organization view, navigate to Services. The Services page shows two cards:
- Tag Manager — Lists your applications and their page view counts
- Data Manager — Shows data endpoints for your organization
Under Tag Manager, find your application in the list. If your application does not appear, it was created automatically when you activated the domain in Step 1 — refresh the page.
Click the expand arrow next to your application to view its details.
Step 4: Get the installation code
In the application detail view, if no data has been received yet, Tag Manager shows a setup dialog:
"It looks like there is no data available for the last 24 hours, are your tags currently installed?"
The dialog provides:
- Configuration selector — Select "Tag Manager" from the dropdown to get the correct script
- Installation code — A
<script>tag that you add to the<head>of your website
Click the copy button next to the code snippet to copy it to your clipboard.
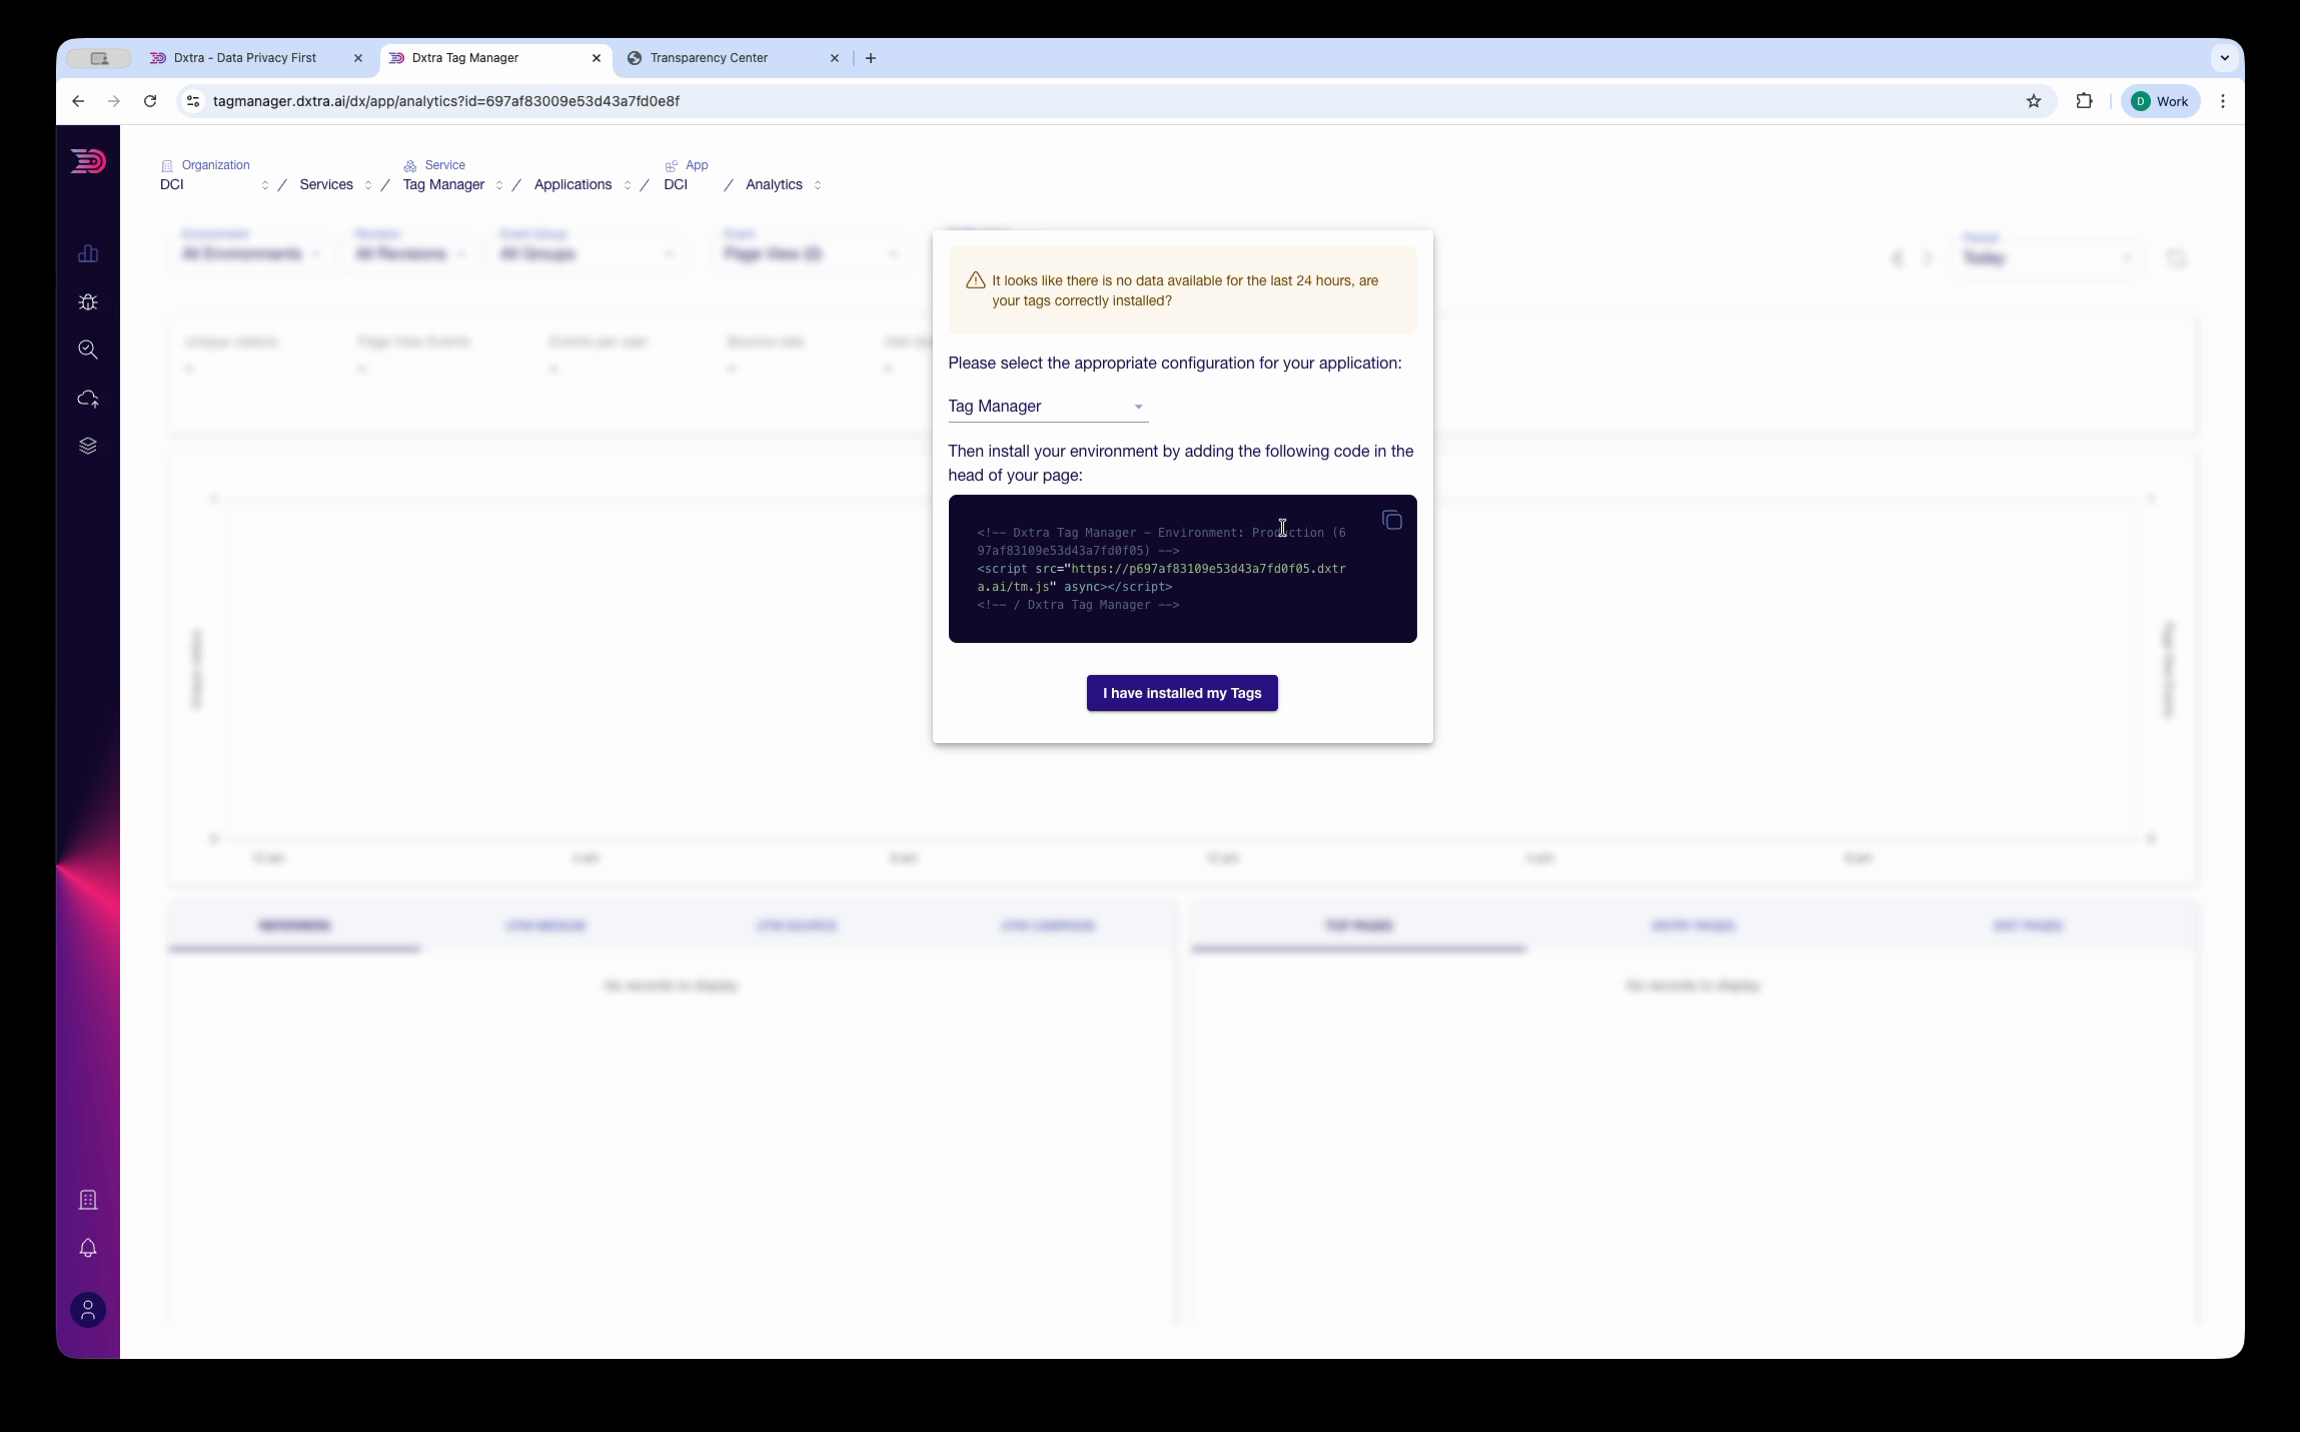
The script tag looks like this:
The tm.js script is a self-contained bundle that includes your tag rules and configuration. It does not require data-api or data-domain attributes.
Warning
The actual script tag uses your application's unique domain. Always use the code generated by Tag Manager — do not construct the snippet manually.
Step 5: Add the script to your website
Add the copied <script> tag to the <head> section of every page on your website. How you do this depends on your platform:
Static HTML
Paste the script tag directly into the <head> of your HTML files:
<!DOCTYPE html>
<html>
<head>
  <meta charset="utf-8">
  <title>Your Page</title>
  <!-- Dxtra Tag Manager -->
  <script async src="https://<your-tag-manager-domain>/tm.js"></script>
</head>
<body>
  ...
</body>
</html>
Next.js
In your app/layout.tsx (App Router) or pages/_document.tsx (Pages Router), add the script using Next.js's <Script> component:
import Script from 'next/script'

export default function RootLayout({ children }) {
  return (
    <html>
      <head>
        <Script
          src="https://<your-tag-manager-domain>/tm.js"
          strategy="afterInteractive"
        />
      </head>
      <body>{children}</body>
    </html>
  )
}
React (Create React App / Vite)
Add the script tag to your public/index.html file's <head> section.
WordPress
Add the script tag using a plugin like "Insert Headers and Footers," or add it directly to your theme's header.php file within the <head> tag.
Shopify
Go to Online Store > Themes > Edit Code and add the script tag to the <head> section of your theme.liquid file.
Step 6: Verify the installation
After deploying the script to your site:
- Visit your website in a browser to generate at least one page view
- Return to the Tag Manager application at
tagmanager.dxtra.ai - Navigate to your application and check the Metrics or Analytics tab
- Click I have installed my Tags in the setup dialog to dismiss it
Data typically appears within a few minutes. If the Hit Count and Page Views columns show values, your installation is working.
Note
The analytics dashboard shows data for configurable time ranges. If you just installed the script, select a short range (last 24 hours) to see your initial data points.
Troubleshooting
No data appearing after installation — Verify the script tag is present in your page's <head> by viewing the page source in your browser. Check the Network tab in developer tools for a request to <your-tag-manager-domain>/tm.js. Ensure the script is not being blocked by an ad blocker or content security policy.
Domain not appearing in dropdown — The domain must be verified in Dxtra before it can be activated for Tag Manager. Go to Settings > Domains in the Dxtra dashboard to verify your domain.
Script blocked by Content Security Policy — If your site uses a CSP, add your Tag Manager domain to your script-src and connect-src directives (the exact host is shown in the installation script in your dashboard):
Content-Security-Policy: script-src 'self' https://<your-tag-manager-domain>; connect-src 'self' https://<your-tag-manager-domain>;
Multiple domains — Each domain requires its own Tag Manager activation and script tag. Do not reuse a script tag configured for one domain on another.
What you just did
You activated Tag Manager for your domain, logged in to the Tag Manager application, copied the tracking script, and added it to your website. Page views and events are now being captured and processed server-side.
Next steps
- Configure consent enforcement — Set up consent categories so Tag Manager blocks non-consented tracking automatically
- Set up event tracking — Define custom events beyond page views
- Review your processing activity logs — See the audit trail of what Tag Manager is collecting
Related
- Tag Manager overview — How Tag Manager works
- Consent enforcement — Configure consent rules for event tracking
- Event tracking — Define events and properties
- Consent management — Configure consent categories in Dxtra
Not legal advice
This documentation provides guidance on installing Dxtra Tag Manager. AI-generated content does not constitute legal advice. Consult a qualified legal professional for advice specific to your jurisdiction and business context.