Scan files for personal data
This guide walks you through connecting a file storage processor and scanning its contents for personal and sensitive data. Once scanning is configured, Dxtra continuously monitors connected processors for new or modified files and scans them automatically.
Prerequisites
- A Dxtra account with admin access
- A file storage processor to scan (e.g. Google Drive, cloud storage, or file share)
- The processor connected via the Processors page
Step 1: Connect a file storage processor
If you have not already connected a file storage processor, go to Processors in the left sidebar and add one. Google Drive is a common starting point — select it from the Select Processor dropdown and follow the onboarding wizard.
The processor must be in Interconnected status in the Manage Processors table before scanning can begin.
Tip
Google Drive integration scans files shared with your organization, including documents, spreadsheets, and images. Scans respect the permissions and sharing settings of each file.
Step 2: Navigate to Data Mapping & Profiling
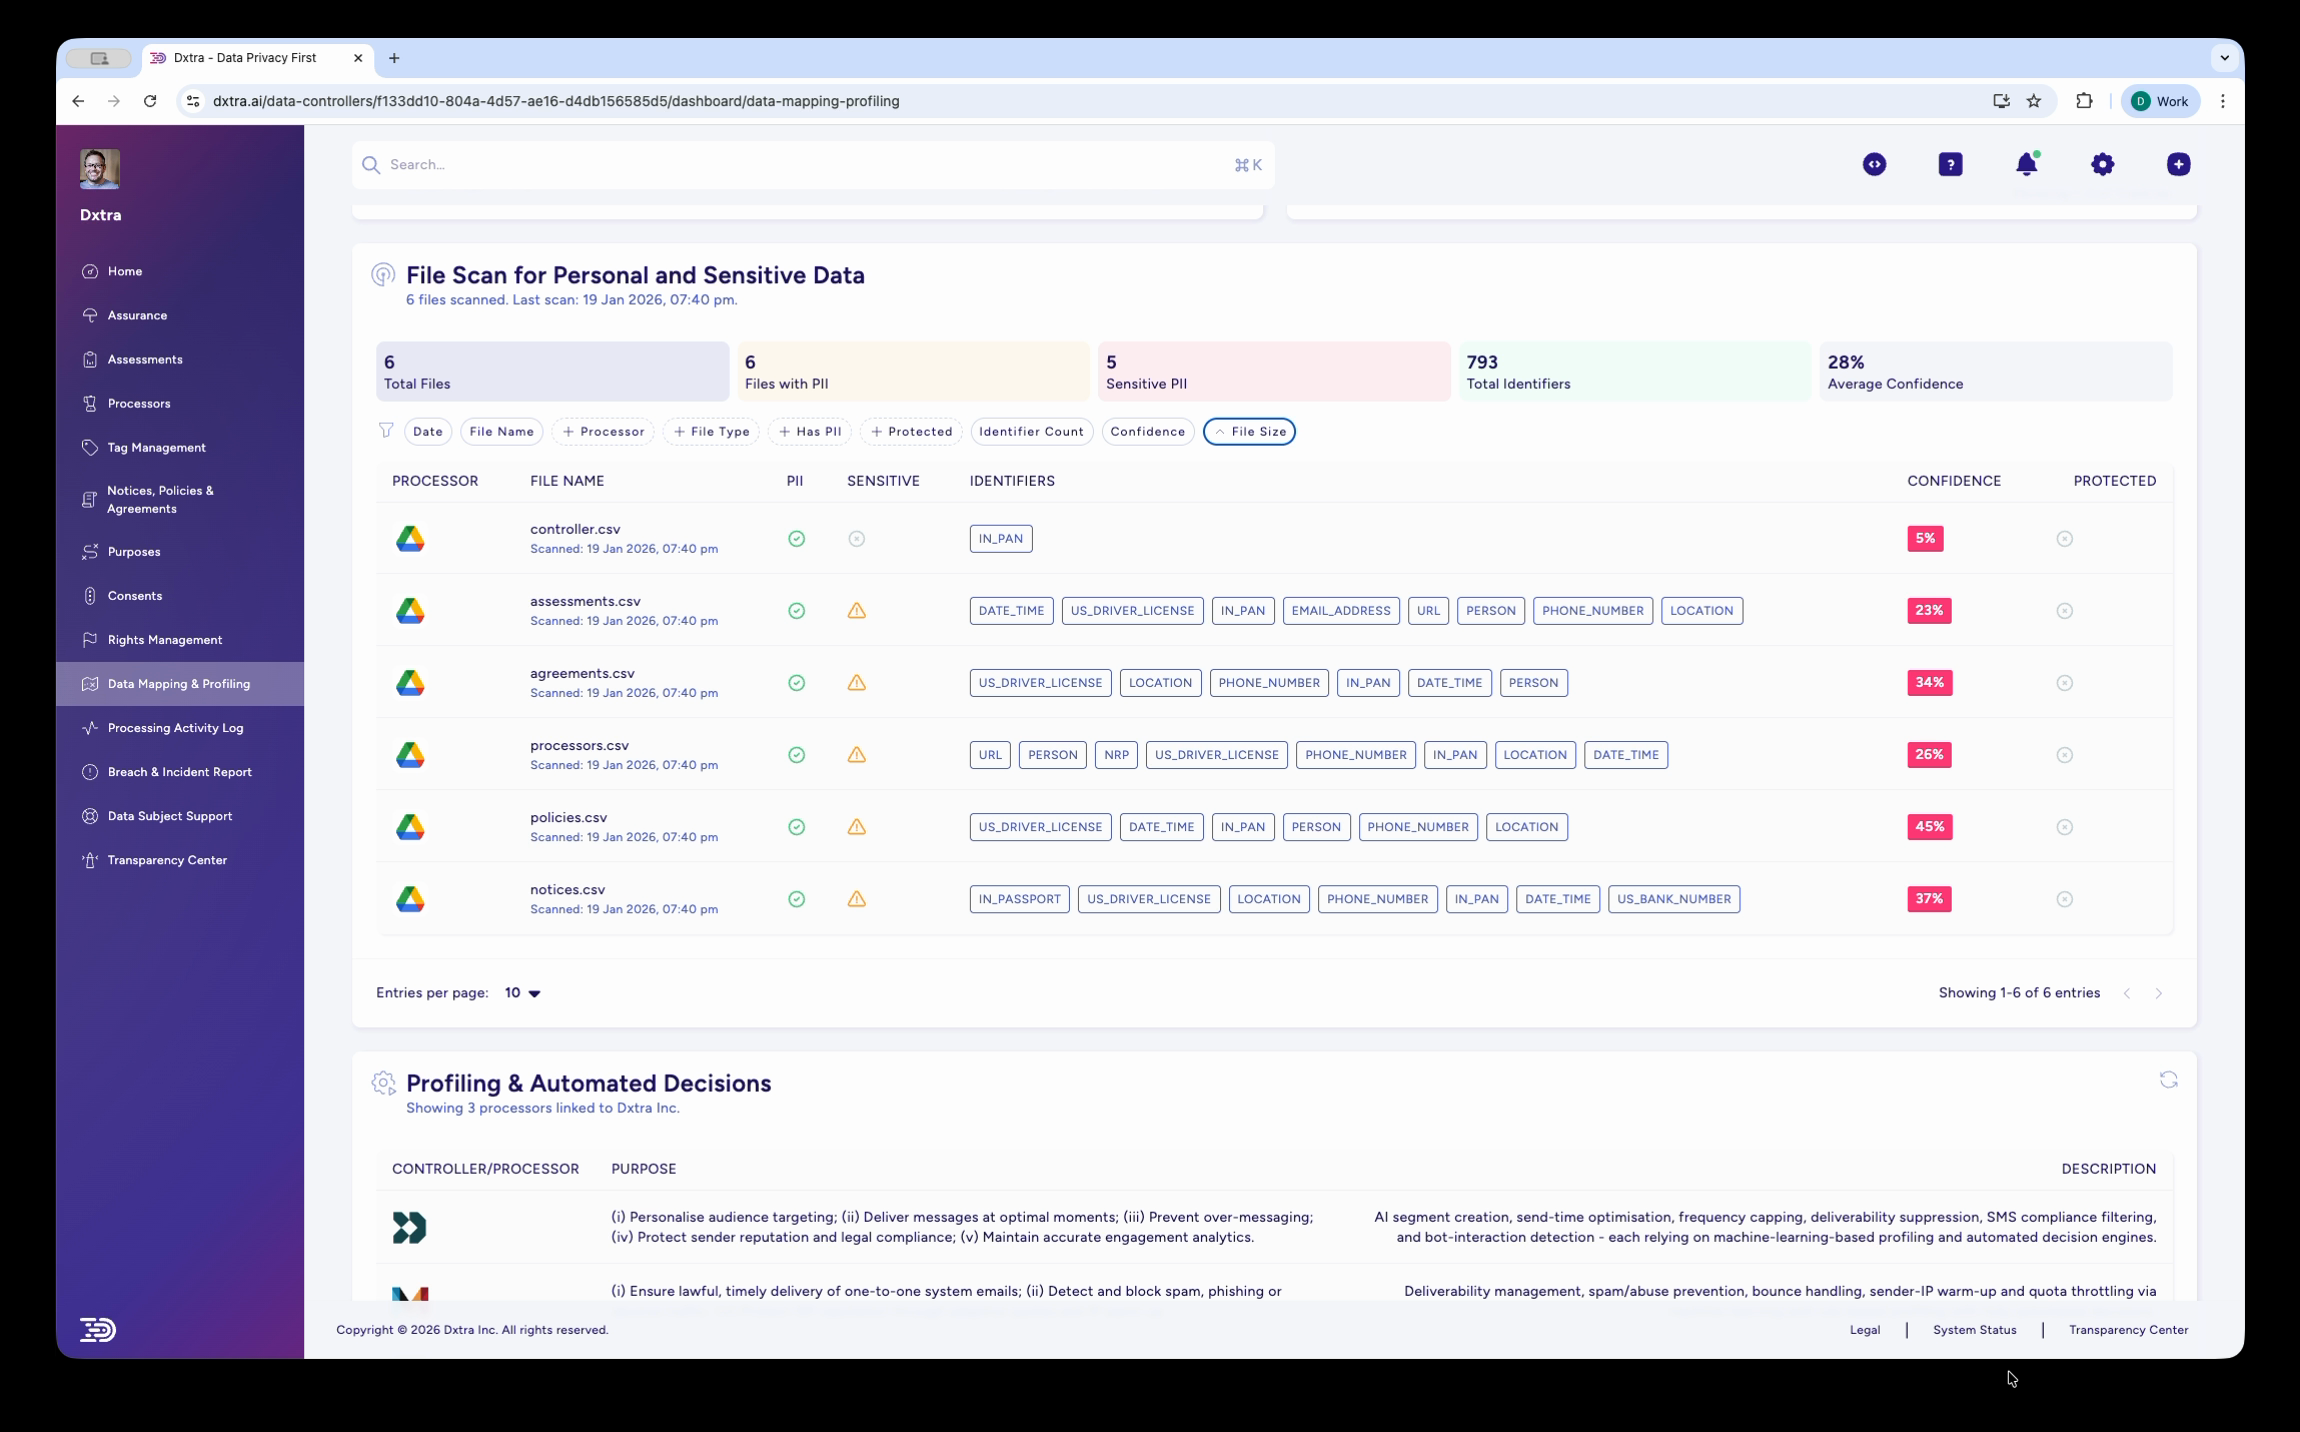
Go to Data Mapping & Profiling in the left sidebar. This page displays the File Scan for Personal and Sensitive Data section where all scan results appear.
If this is your first scan, the results table may be empty or show files being processed. Scanning begins automatically once a file storage processor is connected.
Step 3: Review scan progress
As files are scanned, they appear in the results table. Each row shows:
- The processor the file came from (identified by the processor's icon)
- The file name and when it was scanned
- Identifiers detected — shown as color-coded badges (FIRST_NAME, EMAIL, PHONE_NUMBER, US_DRIVERS_LICENSE, LOCATION, IP_ADDRESS, etc.)
- Confidence score — how certain the detection is
- Protected status — whether the file has protection in place
The summary statistics at the top update as files are scanned: Total Files, Days with PII, Sensitive PII, Total Identifiers, and Average Confidence.
Step 4: Filter and sort results
Use the filter tabs above the results table to narrow your view:
- Processor — Show files from a specific connected processor
- File Name — Search for a specific file
- File Type — Filter by format (CSV, XLSX, PDF, images, etc.)
- Met PII — Show only files where PII was detected
- Protected — Show files by protection status
- Identifier Count — Filter by number of identifiers found
- Confidence — Filter by confidence score range
- File Size — Filter by file size
What gets scanned
Dxtra's scanning engine analyses file contents using pattern matching, named entity recognition, and context analysis. It detects:
Standard identifiers — Names, email addresses, phone numbers, physical addresses, dates of birth, IP addresses, URLs, usernames.
Government identifiers — Driver's license numbers, social security numbers, passport numbers, tax identification numbers. Detection patterns are jurisdiction-aware (US, UK, EU, AU formats).
Financial data — Credit card numbers (with Luhn validation), bank account numbers, IBANs.
Sensitive categories — Medical record indicators, biometric data references, racial/ethnic origin indicators, political opinions, religious beliefs, trade union membership. These are flagged as Sensitive PII in the summary statistics.
For image files and scanned PDFs, OCR (optical character recognition) extracts text before PII detection runs. This means a photo of a driver's license or a scanned contract is analyzed the same way as a text document.
Scanning frequency
Scans run automatically on a continuous basis:
- Initial scan — When a processor is first connected, all accessible files are scanned
- Ongoing monitoring — New files and modified files are scanned as they appear
- Re-scan — You can trigger a manual re-scan from the Data Mapping & Profiling page if needed
Note
Scanning large file repositories may take time. The results table populates progressively as files are processed. Check back after a few hours for a complete view of large repositories.
Troubleshooting
No files appearing — Verify that your file storage processor is in Interconnected status on the Processors page. Check that the processor has files accessible to the integration (shared files, correct folder permissions).
Low confidence scores — Low confidence does not mean the detection is wrong — it means the scanning engine is less certain. Product codes, reference numbers, and other structured data can resemble PII formats. Review low-confidence detections manually.
Files not updating — If modified files are not being re-scanned, check that the processor connection is still active. Go to Processors and verify the status. Reconnect the processor if needed.
Image files not scanned — OCR scanning requires supported image formats (PNG, JPG, TIFF, BMP). Very low-resolution images or heavily stylised text may not be readable by OCR.
Next steps
- Review findings — Validate detections, assess exposure, and take action
- Processing activity logs — Review the audit trail of scanning activity
Related
- PII scanning overview — How scanning and data mapping work
- Processor management — Connect file storage processors
- Data subject rights management — Use scan results to locate data for access requests
Not legal advice
AI-generated content does not constitute legal advice. Consult a qualified legal professional for advice specific to your jurisdiction and business context.